
Create a flight plan


- Open WingtraPilot and select “New” to create a new flight plan
- Give your flight plan a descriptive name, select the camera, and select “Next”
- Import a KML file or skip if you want to plan from scratch
You can also plan your flights in WingtraHub (PC). Learn more at knowledge.wingtra.com/en/flight-planning-in-wingtrahub .
LIDAR
If you’re flying a Wingtra LIDAR mapping sensor, find all the information you need here: https://knowledge.wingtra.com/en/lidar-general-setup.
Center your map
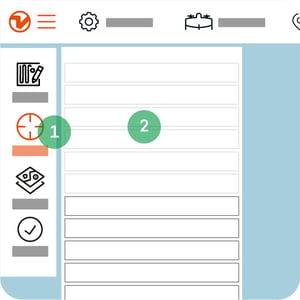
- Use the "Center" or "Search" function to locate the area of interest
- Click on "WingtraOne" to center the map on the current drone location
Create a home point and set the transition height
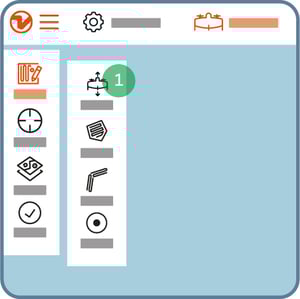
- Tap the "Plan" and then "Home" icon to create a home point at the planned take-off location; it will be updated once connected to the drone
- Adjust transition height and direction; it's the same for take-off and landing
Home point and transition height explained
- Home point is the place where your WingtraOne takes off and lands
- Transition height is where your drone transitions into a forward flight mode
Always set the transition height at least 20 m (65 ft) above obstacles, but not too high! Increased transition height reduces flight time.
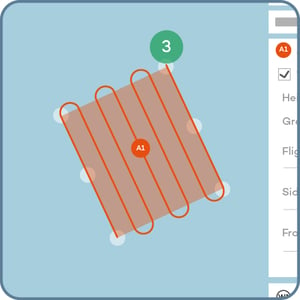
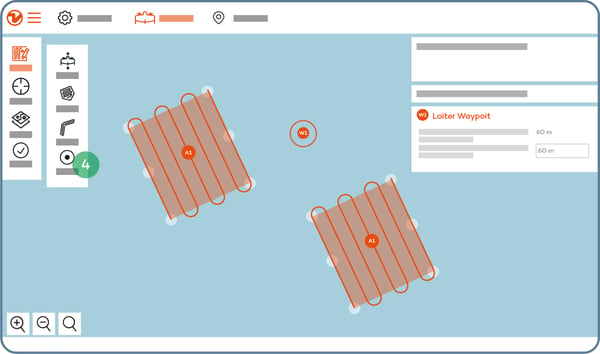
Create area(s) or corridor(s)
An "area" or a "corridor" is where you want your WingtraOne to fly and capture the data.
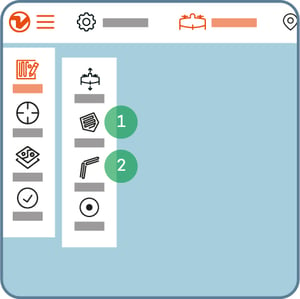
- Add one or several areas by clicking on "Plan" and then "Area"
- If you are using the corridor feature, click on "Plan" and then "Corridor"
- Move the corners until you have outlined the area(s); you can also move the position of the area(s) by moving the A1/A2 bubble in the middle
- When necessary, loiter waypoints are automatically inserted between two areas; additional waypoints can be inserted manually to ensure safe flight paths between areas and back to the home point
Adjust parameters
Important
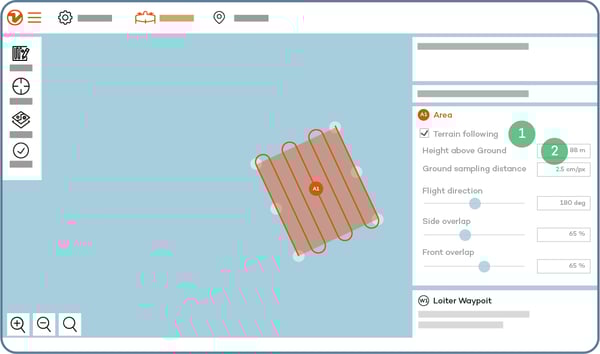
- "Terrain following"—make sure the box is ticked especially when flying over hilly terrain
- "Height above ground" and "Ground sampling distance"—define at what height your drone should fly to get the required GSD
Optional
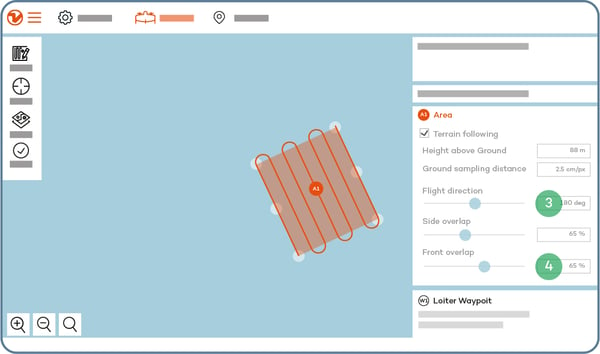
- "Flight direction"—set the angle of your flight direction, if possible perpendicular to the wind direction
- "Side overlap" and "front overlap" is based on percentage, and >60% is recommended (consult knowledge.wingtra.com for more detailed recommendations)
Optional "corridor" parameters
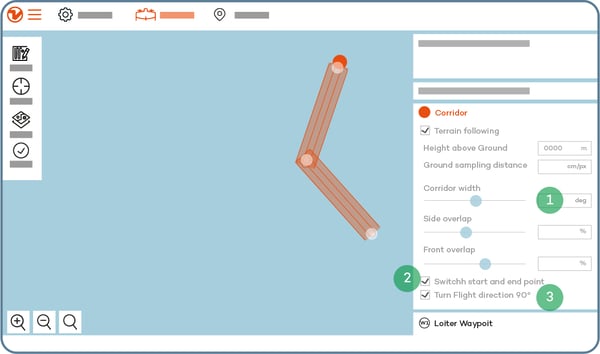
- Define the corridor width
- Switch start and end point
- Turn flight direction 90°, e.g., if the terrain is steep
Adjust safety parameters
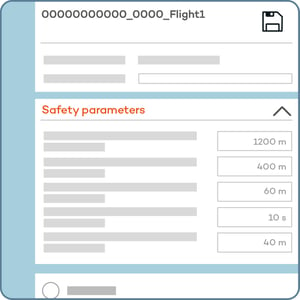
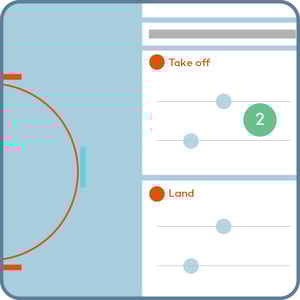
Minimum and maximum height above ground
These parameters define the minimum and maximum height above ground for the flight of the drone.
If the drone cannot fly within these parameters, take off will be denied.
Sections where these safety parameters cannot be respected will be highlighted in red on the altitude graph.
Recommended minimum height is 10 m (30 ft) higher than the tallest object in your area.

Connection loss timeout
This parameter defines the maximum time a telemetry connection can be lost until a flight is aborted and Return to Home (RTH) is triggered.
Increase this value if you are flying beyond visual line of sight (BVLOS) or if you are flying in environments where the telemetry connection cannot be maintained (e.g. due to the topography of the area of operation).
The drone will still collect data, if the telemetry connection is lost during the flight. However, the user interface in WingtraPilot will not be updated in real time.

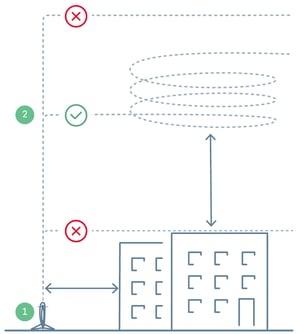
Safe Return To Home (RTH)
The drone will fly home on a safe path. This may not be a direct path to home, depending on the planned mission or topography of the area of operation.
Safe RTH is triggered if:
- The drone flies beyond your geobarrier
- The connection between operator and drone is lost
- Battery gets low
You can adjust the thresholds for the triggers in the “Safety” box of your flight plan.

Adjust geobarrier
Geobarrier type: Circle

This type of geobarrier confines the drone's flight area to a circle with the home point at the center. If the drone crosses this geobarrier, the Return to Home command is triggered automatically.
The dimension of this geobarrier type may be adjusted with the radius, measuring the distance from the home point to the geobarrier.
Geobarrier type: Polygon

This type of geobarrier confines the drone's flight area to a polygon shape. This shape may be modified by moving, adding or removing corner points.
If the drone should cross this geobarrier, the Return to Home command is triggered automatically.
To create a geobarrier from a KML file, drag the imported KML polygon onto the geobarrier settings window.