Data acquisition with WingtraOne RedEdge-P
A guide to the workflow for preparing and executing a WingtraOne RedEdge-P flight.
MiceSense RedEdge-P camera is compatible only with WingtraOne GEN II drones.
The following information will guide you on how to acquire your multispectral data with RedEdge-P successfully.
- In the WingtraPilot welcome menu, create a new flight plan, and select "Micasense RedEdge-P" as the camera
- Plan your flight as described in the Create a new flight plan
- Perform the pre-flight procedure as it is described in the Pre-flight checklist. The steps that are additional to the RGB workflow are described below
Configuring and calibrating RedEdge-P
All the flight planning parameters are set in WingtraPilot, as the image triggering is controlled by the drone.
In the Preflight checklist the camera check is automatically performed. 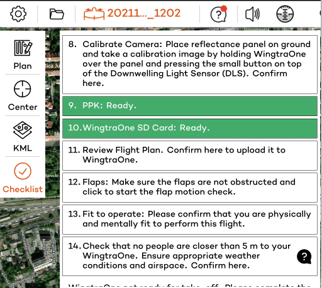
On item 8 of the checklist, you'll see the RedEdge-P camera needs to be calibrated with the provided reflectance panel. Only a timely calibration guarantees reliable spectral information of your covered flight area. For optimal calibration, make sure to take a calibration image before and after each flight.
To calibrate the camera:
- Place the reflectance tag flat onto level ground and make sure no reflective surfaces are near it
- Lift WingtraOne up, and hold it with the camera facing the reflectance tag, at about one meter (3 ft) above it. Make sure to hold it level, and do not cover the reflectance tag with a shadow from you or the drone
- Trigger the image physically using the button the DLS sensor (see picture below the button indicated by the arrow).
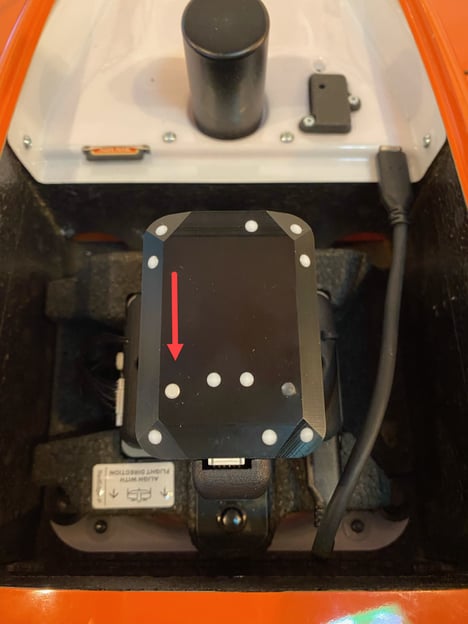
Press hard and shortly until the green-blinking LED below (this is blinking from the moment the drone is powered) turns momentarily blue. This indicates that the image has been triggered.
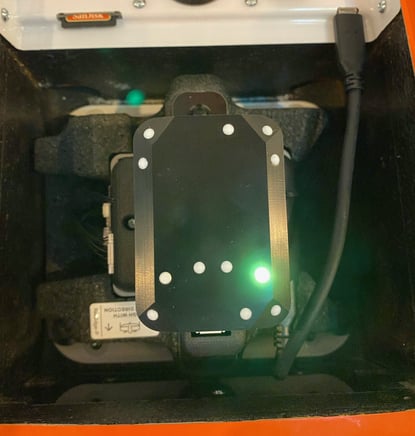
Once the calibration panel image is captured, click on the checklist item to confirm it.
Data organization
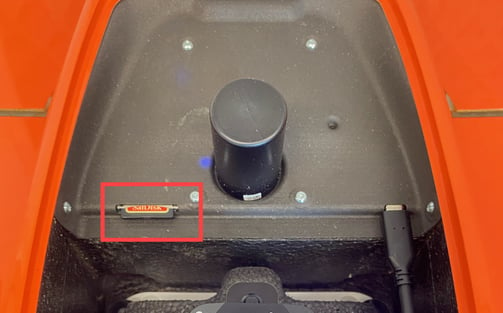
- After shutting off WingtraOne, retrieve the CFexpress card from the camera by pushing the card inwards.
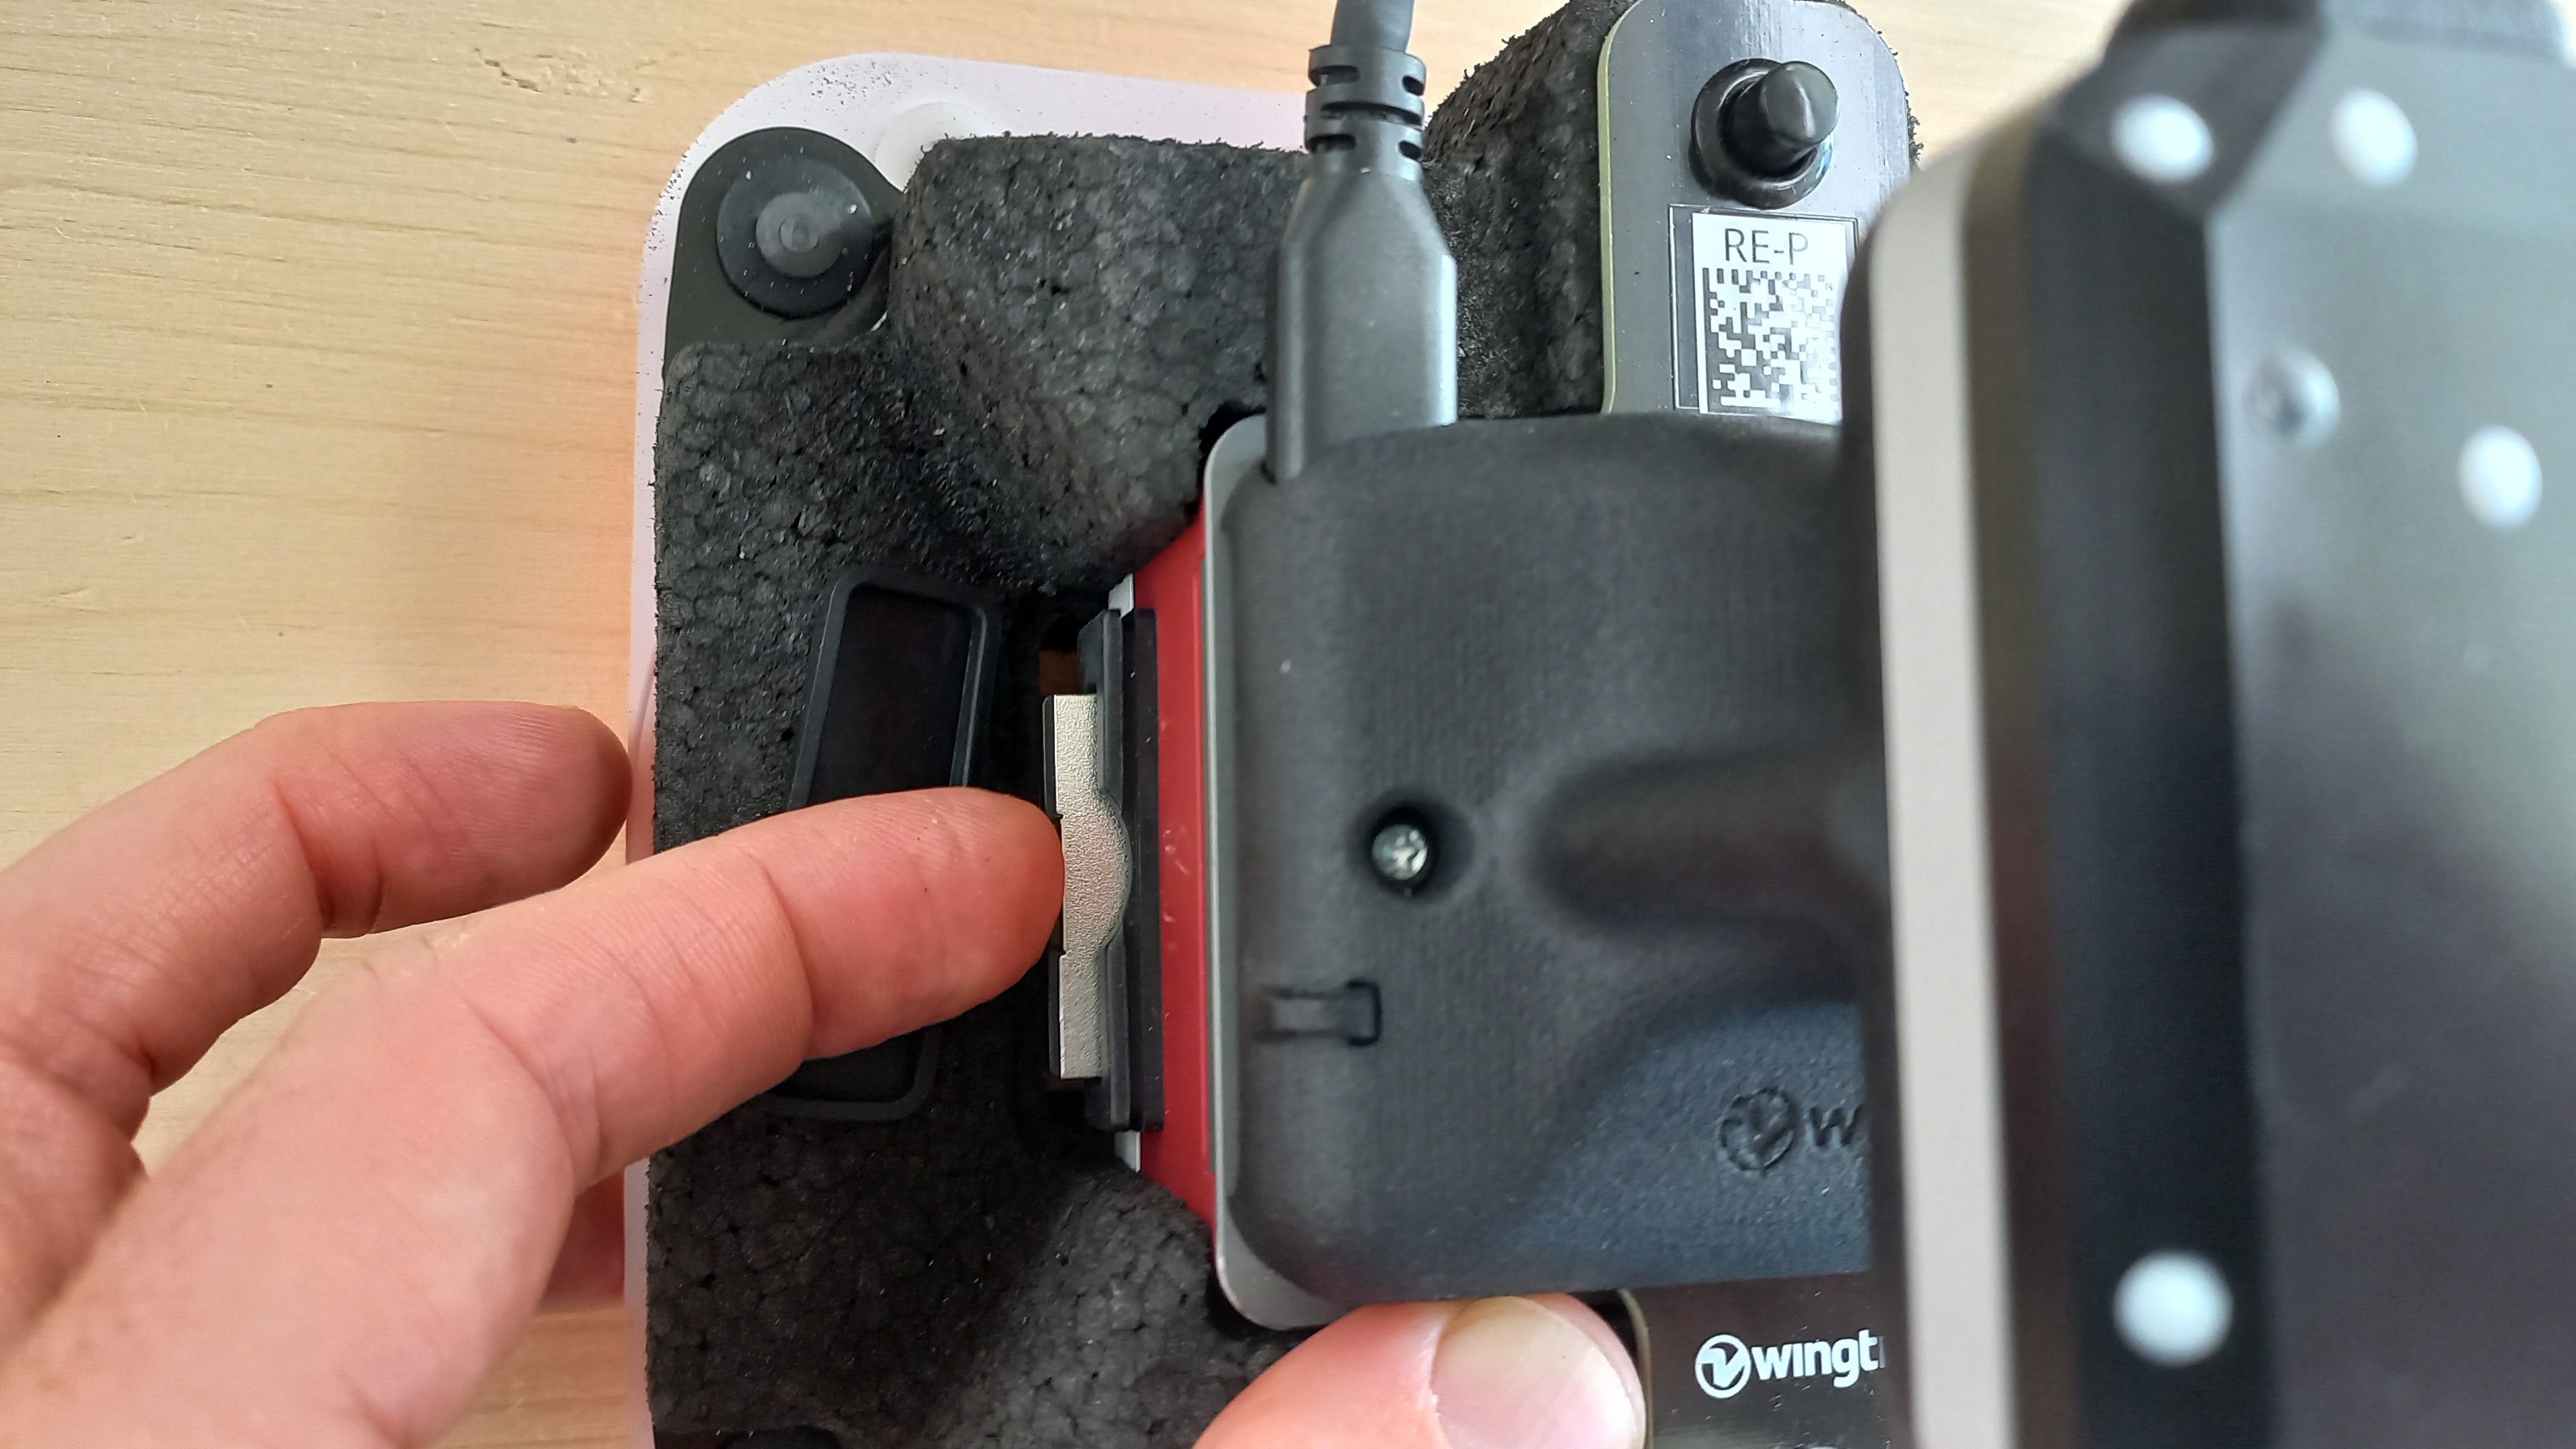
- The camera CF Express card contains the images, which are stored in folders ("0000SET", "0001SET",...)
- The images are already geotagged although without PPK. The metadata, such as geolocation, is written to the EXIF of each image.
- The images are stored in folders (“0000SET”, “0001SET”, ...). A new folder is created each time the camera is powered up or if the maximal number of images per folder is reached.
- For every trigger event, the information from each spectral band is saved in a separate image.
- In order to PPK geotag the images, remove the WingtraOne SD card that is inserted into the drone. The WingtraPilotProjects folder, containing the GNSS data, is saved to the WingtraOne SD card.
- See the full process to PPK geotag multispectral images in the article: PPK geotagging for multispectral imagery.
Processing the information
For processing the information from the MicaSense RedEdge-P we recommend using Agisoft Metashape or Pix4D Fields. Follow the link to see the tutorial on how to process the images and generate the outputs.
More information
For more information about the WingtraOne RedEdge-P setup, please have a look at the Set up the MicaSense RedEdge-P camera article.
Troubleshooting
- LED blinking on DLS2
-
One flash indicates normal behavior, that the sensor is operating as expected. More than one flash indicates an issue as outlined in the following table:
Color
Type
Meaning
Green
1 Flash
Sensor is ready for operation (it has a GPS fix and more than 2 GB available on the storage device)
Blue
1 Flash
Capture completed
Yellow
2 Flashes
GPS unit detected, but does not have a fix
Red
3 Flashes
GPS timeout
Red
4 Flashes
No storage device is installed
Red
5 Flashes
The storage device is full (or almost full)
-
Please note that when formatting the storage device, all the pictures will be deleted.
For more information, please visit the Micasense KnowledgeBase