WingtraOne GEN II: Set up of the MicaSense RedEdge-P camera
Learn how to setup your MicaSense RedEdge-P camera.
The WingtraOne RedEdge-P can capture multispectral and panchromatic images and generate high-resolution images, which can be used in diverse applications including environmental studies, agriculture use cases, and other research areas. MicaSense RedEdge-P combines a panchromatic lens with 5 multispectral lenses. For camera specifications, technical details, and camera-related support, please refer to the knowledge base of Micasense.
For more details about how to set up the RedEdge-P camera and what are the main parts, please check below.
Brief Overview of RedEdge-P Data
Before going into WingtraOne RedEdge-P setup, it is helpful to start with a brief introduction to the nature of the images captured by the RedEdge-P sensor. Similar to the previous RedEdge-MX, this new payload covers five different spectral bands—blue, green, red, red edge, and near-infrared. With the clamor for leaf-level insight in precision agriculture, Micasense's new RedEdge-P payload builds upon the previous version by adding a panchromatic sensor.
The panchromatic sensor has a higher resolution, at 5.1 MP compared to the 1.6 MP of the multispectral sensors, and it captures images with signals across all relevant spectral bands. Leveraging this and using a process called pansharpening, the resolution of the resulting reflectance maps is vastly improved.
Set up for WingtraOne GEN II RedEdge-P
It is important to keep the camera firmware updated at all times. Learn how to update the firmware at the end of this article.
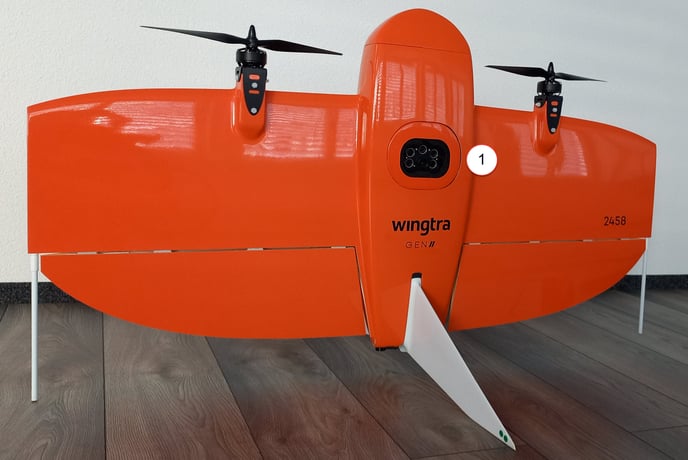
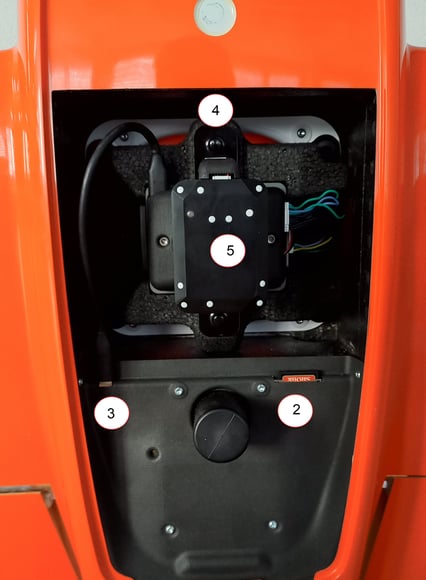
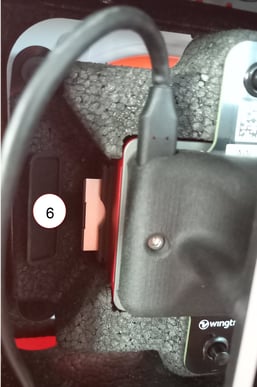
- RedEdge-P camera
- WingtraOne SD card slot; The WingtraOne SD card needs to be inserted into the slot during the flight as the PPK data is stored there. It is also used for updating the firmware and downloading the flight logs. You can find more information about the WingtraOne SD card in the article WingtraOne SD cards.
- Payload connector (USB-C)
- Camera holder beam mechanism, used to fix the camera and should not be removed when flying
- DLS sensor, GPS and compass
- Camera CFexpress card slot
The images are stored in the CFexpress card inserted into the camera. Make sure to use the provided 128 GB SD card. You can find the full specifications of the card in the article WingtraOne SD cards.
For updating WingtraOne or downloading WingtraOne flight logs, use the WingtraOne SD card that is inserted into the drone.
Additionally, the PPK data are stored in the WingtraOne SD card. Find more information about the multispectral PPK processing in the article PPK geotagging of multispectral imagery.
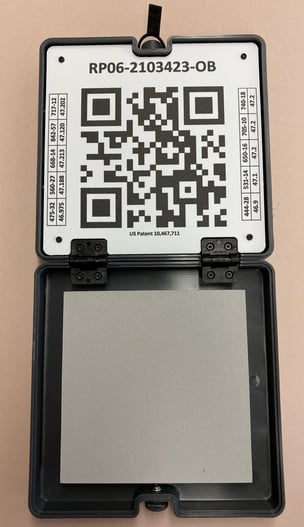
Calibration panel
All MicaSense payloads include a calibration panel. The calibration panel is used to calibrate the reflectance values of the camera. You can find more information about the use of calibration panels in the MicaSense Knowledge Base.
The latest version of the calibration panel is more compact for better transportability. This calibration panel can be used with any MicaSense sensor model, however, to use the QR functionality the camera firmware needs to be updated to the latest version.
Format the CF Express card
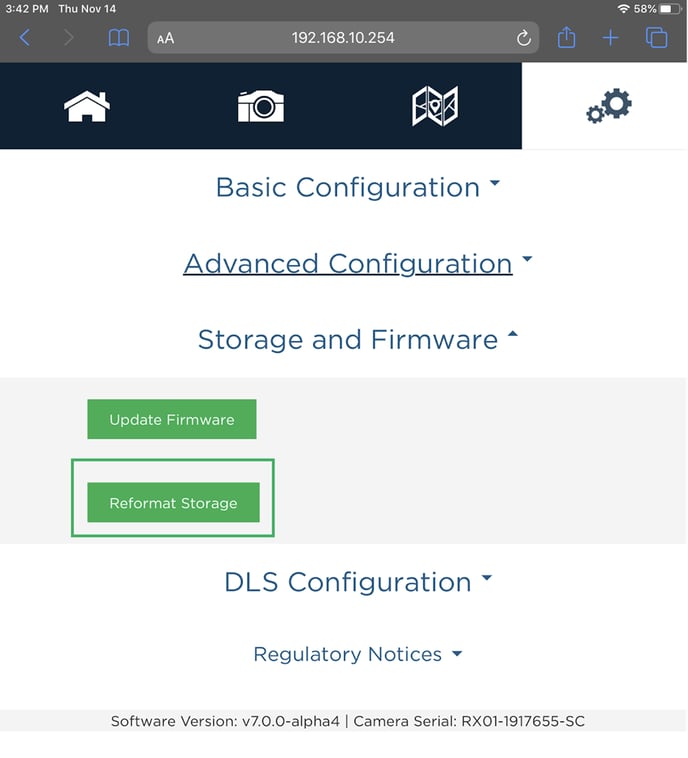
While going through the checklist, WingtraPilot might ask you to format the CF Express card. Since it needs to be formatted in FAT32, we recommend doing it on the camera.
- Power up WingtraOne
- Use the tablet to detect Micasense's Wi-Fi: Rededge-P
- Connect using the password: micasense
- Open Google Chrome and type: 192.168.10.254 on the search bar
Under configuration, click on Reformat Storage
Update RedEdge-P firmware
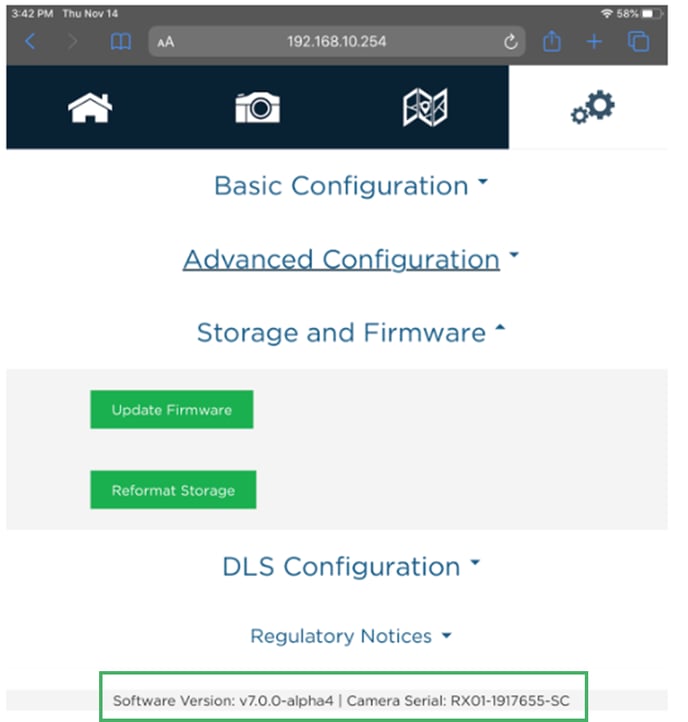
It is important to keep the camera firmware updated at all times. You can see the current firmware version at the bottom of the Settings page (gear icon), when connecting to the camera's Wi-Fi (SSID = RedEdge-P // password = micasense), and access the page http://192.168.10.254.
To update the firmware of the camera follow the steps below:
- The V1.4.1 firmware can be downloaded via MicaSense firmware download page. Download the newest version on your laptop or tablet.
- Unzip the downloaded compressed folder. The zip file contains a software update file (rededgep.bin).
- Connect the CF express card to your laptop or tablet.
- Copy the rededgep.bin file to the CF express card. Make sure it is in the root folder and not within a folder.
- Unmount the CF express card from your laptop or tablet and insert it again in the camera.
- Power on the drone with the RedEDge-P camera inserted and connected through the USB-C cable.
- Wait for about 30 seconds, until the camera’s status LEDs on the DLS2 sensor starts flashing.
- To confirm that the update has been performed, connect to the camera's interface (see below how) and check on the Settings page that the correct firmware version is displayed.
- Detect Micasense's Wi-Fi: Rededge-P
- Connect using the password: micasense
- Open Google Chrome and type: 192.168.10.254 on the search bar
After the update is performed, it is recommended you delete the .bin file from the SD card so that the update is not initiated again next time you power on the drone.