PPK geotagging of multispectral (Micasense RedEdge and Altum) imagery is available only for WingtraOne GEN II drones.
It is recommended to go through the PPK tutorial to learn more about the details of the PPK geotagging process.
If you have a WingtraOne GEN II, high precision PPK processing will yield centimeter-level accuracy geotags for your multispectral images. If you have a WingtraOne GEN I, please read the Non-PPK geotagging article.
For every flight mission, a folder with the project's name is created on the WingtraOne SD card in the "WingtraPilotProjects" folder. The GNSS data of the corresponding flight are saved in this project folder. The camera SD card contains the images, which are stored in folders ("0000SET", "0001SET",...). You can geotag the collected images in the office after completing multiple flights throughout the day.
You can only apply PPK geotagging on WingtraHub software. Check out the Install WingtraHub - PPK processing toolchain for information about how to install and set up WingtraHub correctly.
Step by step instructions
1. After the flight(s), take out the WingtraOne SD card from the drone, put it into the computer, and copy the WingtraPilotProjects folder to your computer, preferably an SSD drive.
Geotagging the images in the SD card can be slow. Therefore, we recommend copying the data in an SSD drive before starting the processing.
2. Take the SD card out of the camera and insert it into the computer.
3. Open WingtraHub software on your computer and go to the Geotagging tab and select the "WingtraPilotProjects" folder on your SD card or the copied folder from your computer.
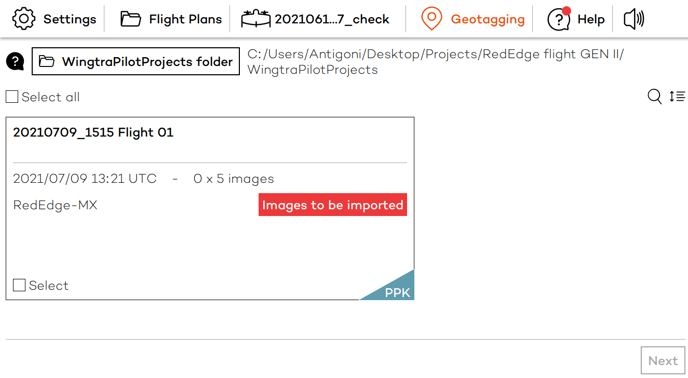
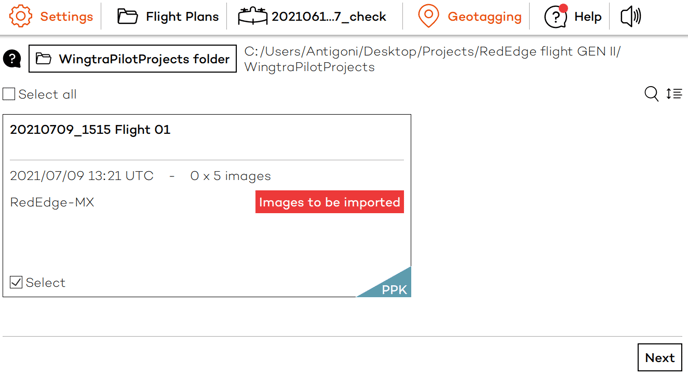
4. Select the project(s) that you would like to geotag, then click "Next." The images will be imported in a later stage.
Note that projects with PPK enabled are labeled with "PPK" on the bottom right corner of the project boxes.
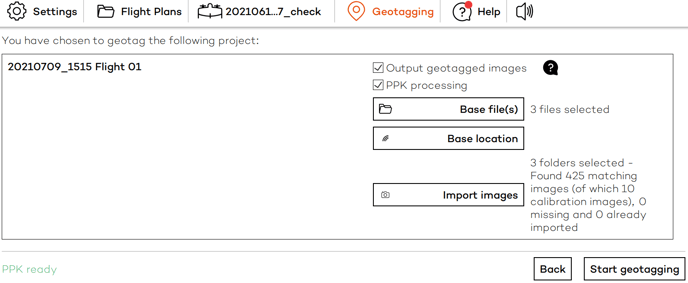
5. Define the processing details for all projects using the batch options on top of the screen, or you can adjust the settings for every flight individually. When using the batch options, you can still change the settings for specific projects after pressing "Apply to all Projects."
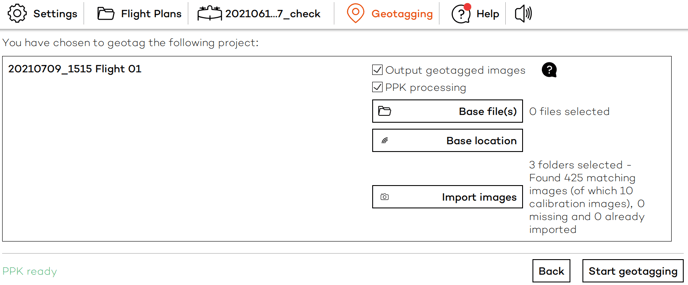
- Make sure the "PPK processing" checkbox is selected to enable PPK geotagging. Make sure that the PPK license has been enabled.
- To save processing time and storage space, you can deselect the option "Output geotagged images". When this option is enabled, images will be duplicated into the OUTPUT folder and will have embedded geolocation and orientation information. By unticking the box of this option, only a *.csv file containing all image coordinates with their accuracy and all the orientation parameters is created. When possible, we recommend using .csv to import the geotags into your photogrammetry software to save processing time in WingtraHub and storage space. However, some post-processing software, such as Pix4Dmatic and DroneDeploy, do not allow the import of .csv files and you need to use the tagged images.
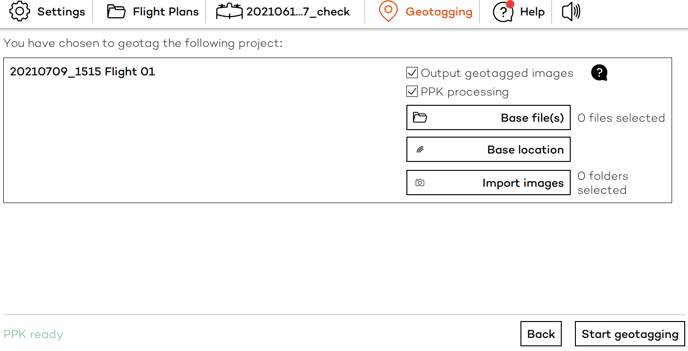
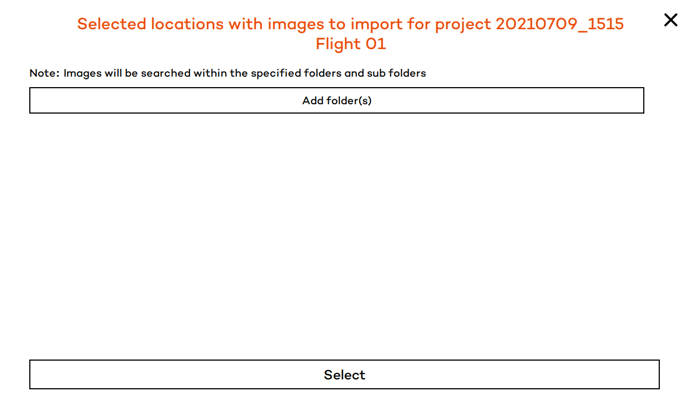
6. Click on "Import images" and select the folders where the images are stored. You can select the parent folder, where all the sets of images are stored. WingtraHub will automatically match the images with the right project. Note that you should maintain the structure of the camera SD card (0000SET, 0001SET,...) as WingtraHub is looking for this folder naming to correctly select all the images of a project.
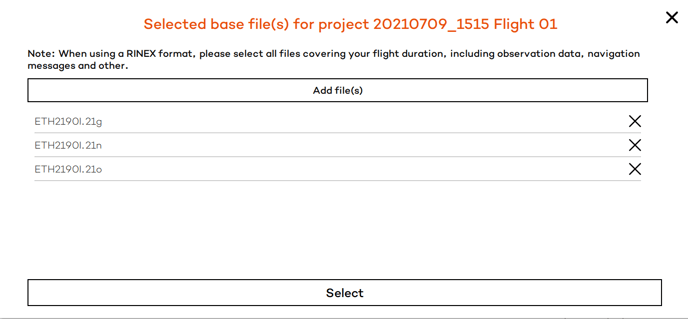
7. Select the "Base file(s)" as reference(s) for PPK processing. Please check out the PPK base station article to learn about the different base station options.
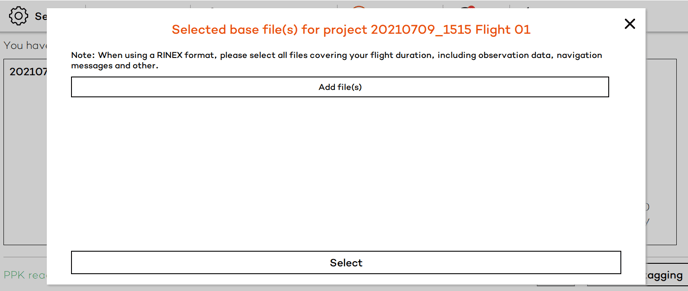
Make sure to select all the available RINEX files.
8. Define the base location. Click on "Base location" and then on "Add new" if you have not defined the base location for this project already. In case no base location is specified, the first position defined in the base file is used.
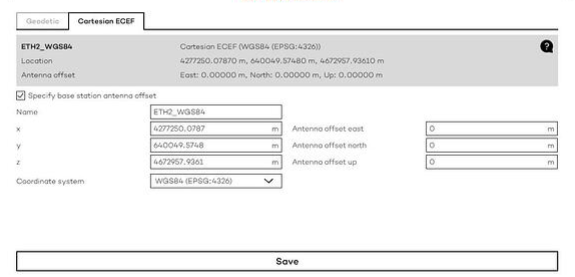
- Add a new base station location with high-precision coordinates and give it a descriptive name (it's best to include the coordinate system used). WingtraHub will remember your base locations. Wingtra recommends using WGS84 with ellipsoidal height as the coordinate system for your base location. For more information on the coordinate system requirements, please see the Coordinate systems for WingtraOne PPK article. Once the coordinates are entered, press "Save" and select the newly created base location in the base location selector.
If you use your own base station, enter the coordinates of the antenna reference point (ARP) of the GNSS receiver. If you get a warning that the antenna type can not be detected from the RINEX file, add the offset from the reference point to phase center (APC - ARP) to the field "Antenna offset up."
In case the coordinates of a known point on the ground are given, add the height of the tripod (ground to ARP) to the field "Antenna offset up."
9. After setting all the options, click "Start processing" in the bottom right corner and observe the processing steps. For batch processing of several projects, WingtraHub will automatically process one project after another.
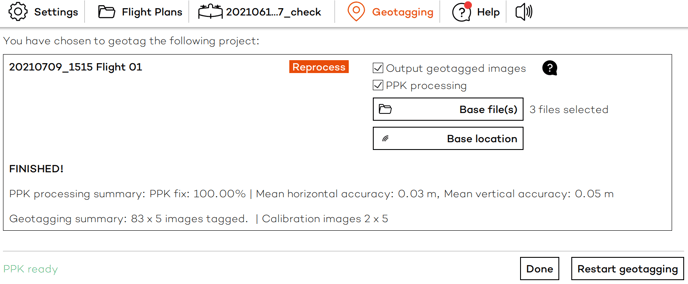
10. Have a look at your results. WingtraHub will display the PPK fix percentage and the horizontal and vertical accuracies in meters for each project individually. To access the full output, navigate to the OUTPUT folder in WingtraPilotsProject folder and inspect the PDF report, the geotags.csv file and the geotagged images. Use the images and .csv for processing in Pix4D, Agisoft Photoscan or similar.