General recommendations
- WingtraOne datasets, in particular those that are captured with the MicaSense RE-P sensor, can be quite large. Please make sure to have enough computing resources available.
- We recommend >= 32GB RAM, >6 core and enough high-speed SSD storage.
💡 At the moment, Metashape is not directly compatible with PPK-geotagged images. If you ran PPK geotagging, we recommend using the raw images collected by the drone and importing the geotags CSV file for more precise location information.
Step 1. Create the project and import the images
- Open Metashape and create a new project (File -> New)
- Open the Workflow menu and select Add Photos or Add Folder to import all the images
- Select Multi-camera system
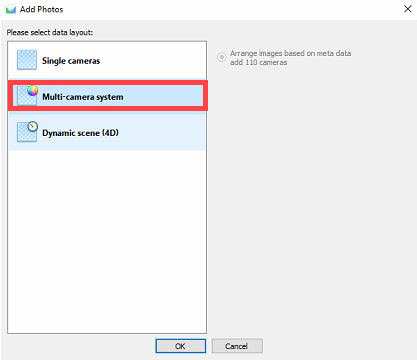
Metashape identifies the calibration images and moves them to a special camera folder so that they are not used in the alignment.
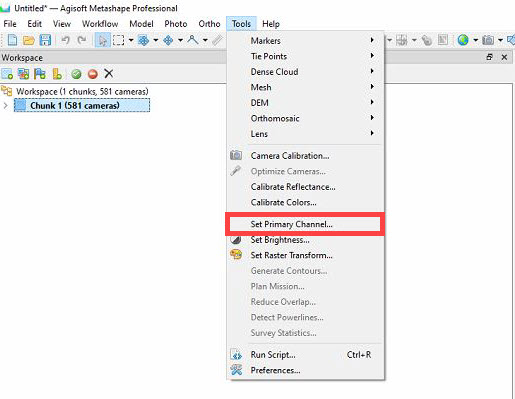
Step 2. Set primary channel to Panchro band
To use the higher resolution panchromatic band to align the data, make sure that you set the primary channel to Panchro under the Tools -> Set Primary Channel menu.
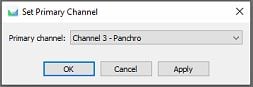
In the Set Primary Channel window select Channel 3 - Panchro and then click on Apply and OK.
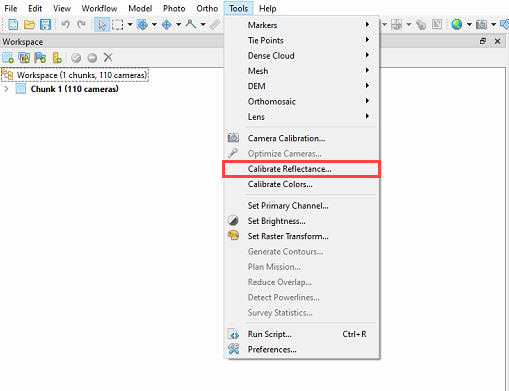
Step 3. Calibrate camera
In order to compare the multispectral data to other measuring tools, to satellite imagery, or even across different times of the season, it is important that the images are calibrated radiometrically. The images of the calibration panel that were taken before and after the flight are used for this step.
To implement the calibration, go to the Tools menu and then select Calibrate Reflectance...
In the window that pops up, select Locate Panels, and the software will look for the pictures of the reflectance panel. It will also show the corresponding reflectance values for each band.
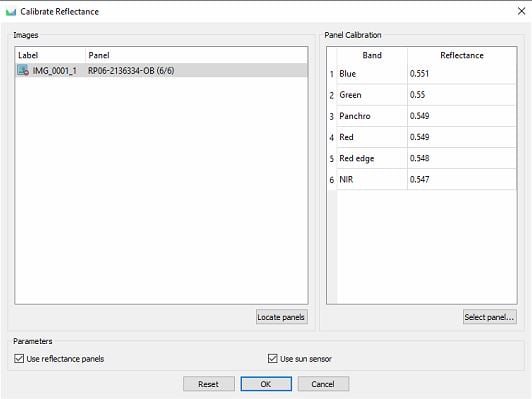
Note that a warning message indicating a missing panel calibration value will come up. This is because the panchromatic band does not need reflectance calibration.
While most panels have the Panel Reflectance Values printed in the QR codes, you may need the full list of reflectance values across the entire measured spectrum, typically from 250 nm to 950 nm.
To obtain your panel’s reflectance values, please send your panel serial number to the MicaSense Support Team here.
Once you receive the .CSV file from MicaSense, please click Select Panel to upload the .CSV file.
Make sure you check the Use reflectance panel options at the bottom of the window. For sun sensor calibration, we only recommend this if the drone was flown under overcast conditions. If the skies were clear, reflectance panel calibration is sufficient.
Set Brightness: Go to Tools in the menu and select Set Brightness.

In the Image Brightness window, select Estimate and then Apply.
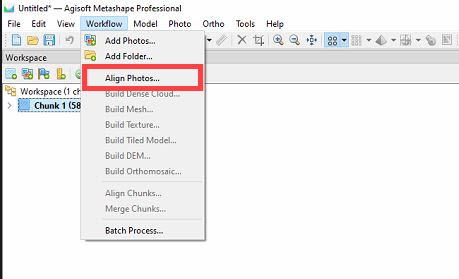
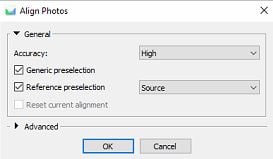
Step 4. Align photos
Open the Align photos ... dialog from the Workflow menu.
We recommend using High accuracy and that you tick the Generic preselection and Reference preselection boxes.
Once this step is completed, in the Model view you can see the computed camera locations and tie point cloud.
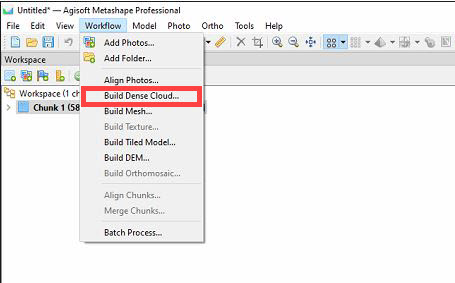
Step 5. Build dense cloud
Open the Build Dense Cloud dialog from the Workflow menu.
We recommend using High Quality for better results. Note that this can increase the processing time.
Step 6. Build DEM
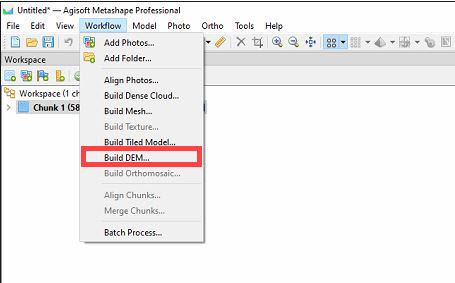
We recommend using High Quality for better results. Note that this can increase the processing time.
Step 7. Build orthomosaic
Open the Build Orthomosaic dialog from the Workflow menu.
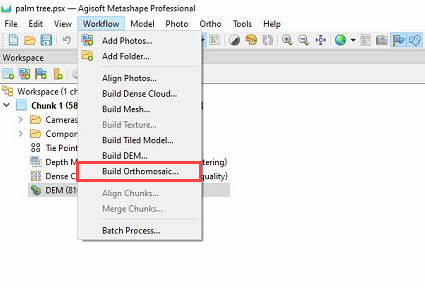
Use DEM as a source surface. Note that the software will take some time since it needs to create 6 orthomosaics (one for each band).
You can view the Orthomosaic by double-clicking on Orthomosaics under Chunk1
Step 8. Pansharpening
Pansharpening can be done in Metashape using the raster calculator. Pansharpening uses a higher-resolution panchromatic image fused with lower-resolution multiband images to create a higher-resolution raster dataset.
Open the Raster Calculator from the Tools menu and use the formulas below to pansharpen the bands for a pansharpened version of the dataset.
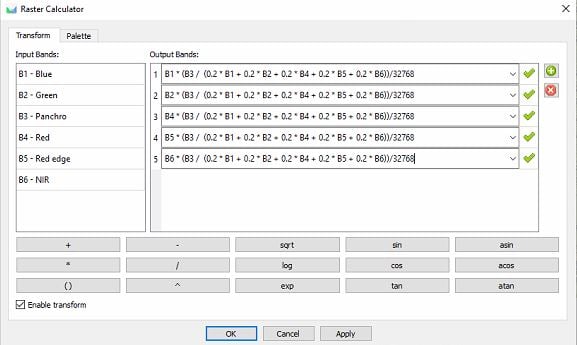
You can copy the formulas below:
B1 * (B3 / (0.2 * B1 + 0.2 * B2 + 0.2 * B4 + 0.2 * B5 + 0.2 * B6)) / 32768
B2 * (B3 / (0.2 * B1 + 0.2 * B2 + 0.2 * B4 + 0.2 * B5 + 0.2 * B6)) / 32768
B4 * (B3 / (0.2 * B1 + 0.2 * B2 + 0.2 * B4 + 0.2 * B5 + 0.2 * B6)) / 32768
B5 * (B3 / (0.2 * B1 + 0.2 * B2 + 0.2 * B4 + 0.2 * B5 + 0.2 * B6)) / 32768
B6 * (B3 / (0.2 * B1 + 0.2 * B2 + 0.2 * B4 + 0.2 * B5 + 0.2 * B6)) / 32768
Step 9. Export the orthomosaic
To export the orthomosaic with the above raster transformation, select on the File menu the Export Orthomosaic -> Export JPEG/TIFF/PNG option. In the Export Orthomosaic page, set the Raster transform field to Index Value and Export the orthomosaic.
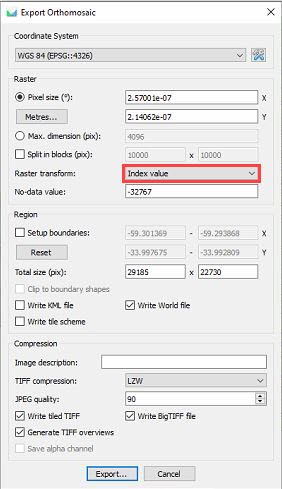
If you don't want to create a pan-sharpened dataset, you can choose "None" in the Raster transform field.
If you are interested in creating additional multispectral products from RE-P data, you can find more information in the article Creating multispectral products with RedEdge-P and QGIS.