To start planning a flight on the tablet (WingtraPilot) or on a Windows computer (WingtraHub), go to the Flight Plans menu and select "New".
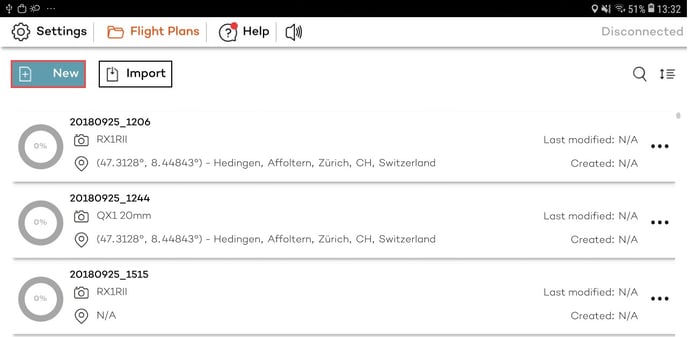
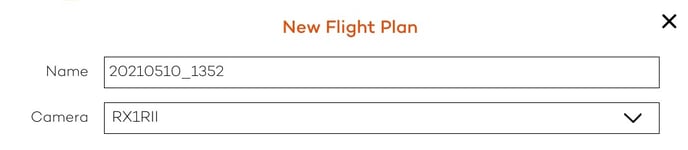
Follow the wizard to set up the high-level settings of the flight plan. Create a new flight plan and enter a descriptive name. As a default, the current date and time are suggested. Select also the camera you will use, click "Next".
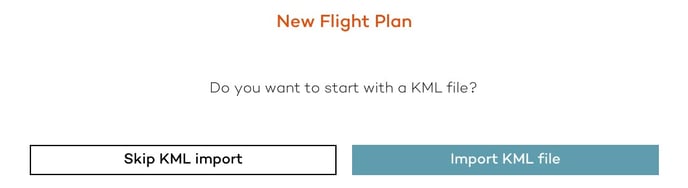
Select if you want to import a .kml file so that you create the flight plan based on this.
The flight planning procedure contains these steps:
- (Optional) import KML
- Start flight plan creation
- Set home
- Add area(s) or corridor
- (Optional) Add loiter waypoints
- (Optional) adjust geobarrier
Step 1: (optional) import KML
You can plan your flight based on KML files that you import into WingtraPilot (see: KML for flight planning).
Step 2: create the flight plan
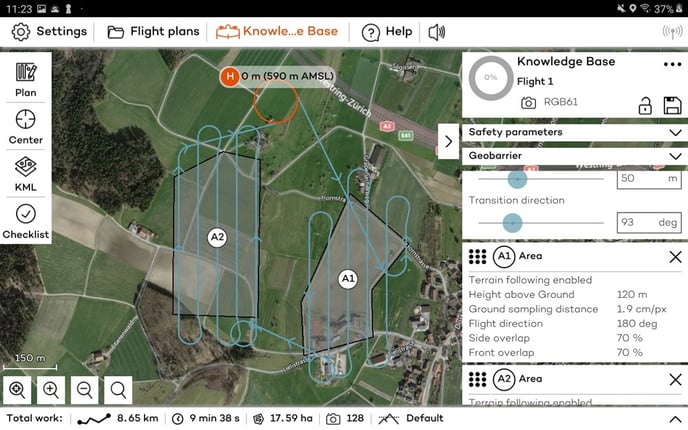
 All the tools to create a flight plan show up by clicking on the Plan icon. This is the starting point for setting up the mission.
Step 3: set home for take-off and landing

If your take-off location is not in view when planning, navigate manually to the desired location or use the search function on the bottom left. Adjust "transition height" and "transition direction" on the right side so that WingtraOne will not collide with any obstacle. Landing is always identical to take-off.
WingtraOne will take off, rise to your "transition height" above home, transition into forward flight, fly to the drawn loiter circle, loiter up to the area height and start data collection. After finishing data collection, it will fly back to the loiter circle at the height of the last area, loiter down to "transition height," fly back to the home point, transition above home, and land.
Take-off location
Make sure the take-off point is at a safe distance from people and obstacles. The drone should be at least 5 m away from the obstacles with a wind speed up to 5 m/s and 15 m if the wind speed is higher on the ground.
Place it on even ground (slope less than 15°).
Make sure it doesn't sink into mud and that the grass surrounding it is not too high.


Step 4: add area(s) or corridor
To map a region of interest, you have to add one or several area(s) to your flight plan. You can add them manually or by importing a KML file and transforming polygons of the KML file into areas.
 Add area(s) manually: You can add one or several area(s) manually by clicking on the area item on the left. Move the corners until you have drawn the area(s) that you want to map. Additional corners can be added by clicking on points in between any two corners. By clicking on a corner you will remove it. Areas can be removed by pressing the cross in the top right corner of the area dialog box.
Add area(s) from KML: You can import and display KML files into WingtraPilot, and transform polygons of the KML into area(s) of the flight plan. How to import a KML is described in the KML for flight planning article.
After adding an area, define if you want to enable terrain following, set the desired GSD and overlaps, and define the connection between different areas.
Terrain following: For every area, you can define if terrain following should be enabled or not. This feature is explained in detail in the Terrain following article.
GSD, overlaps, flight direction: For every area, you can choose the desired ground sample distance (GSD), which defines the size of a pixel on the ground. It is directly linked to the flight height, which you can adjust alternatively. In most cases, it is advisable to adjust the flight direction. You can also adjust the side and front overlaps of the images. Decrease the side overlap to maximize the area/minimize the flight time. Increase the overlaps to optimize the final map quality. Reliable orthomosaics can be generated from imagery taken with as low as 60% front and side overlaps for areas without forest or buildings. For more sophisticated landscapes, you have to increase the overlaps.
Connection between different areas: WingtraOne flies between two areas directly from the last sweep of the initial area to the first sweep of the next area. The height adjustments between areas happen at the exit/entry points. WingtraOne flies always between 2 areas/corridors on the height of the higher of the two points.
A loiter waypoint can be inserted manually between the areas to facilitate a safer transition in case there is an obstacle between them.
 Add Corridor: You can add a Corridor area for mapping linear features, such as roads, railways or other linear infrastructures. To manually add a corridor area, click on the Corridor icon and set the start and end point of the corridor. Move the corners in such a way that they follow the direction of the feature to map. This feature is explained in detail in the Corridor mapping article.
Step 5: (optional) introduce loiter waypoints
 Loiter waypoints can be inserted manually to ensure the safe transition between areas or between the flight path and the Home point. More details about how to use the loiter waypoints are provided in the Flight planning tools article.
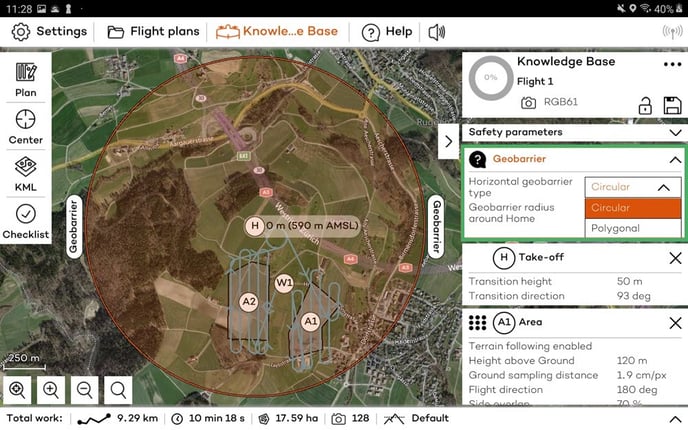
Step 6: (optional) adjust geobarrier
There are 2 types of geobarrier, the circular and the polygonal. You can see the 2 options, by clicking on the Geobarrier menu on the right size. The default option is the circular geobarrier, which is a circle centered around the home point, and the default radius is 1200 m.
You can switch to the polygonal geobarrier and a rectangle 400x400 m centered on the home point will appear. This can be adjusted so that it fits the area that flying is permitted. To adjust the geobarrier shape move the corners of the polygon. The polygonal geobarrier can also be dragged when selected by clicking on the Geobarrier label that appears inside the polygon. The polygonal geobarrier can be created based on a KML file. For more information read the article KML for flight planning.
Furthermore, you can adjust the connection loss timeout. This value defines how long WingtraOne will continue its mission before triggering RTH if RC and telemetry connections are somehow lost.
Have a look at Safety parameters for advanced information about the safety settings of your flight.
Lock flight plan
The locking icon located next to the saving icon allows to easily lock and unlock a mission to prevent unintentional changes. When the flight plan is locked, the color of the icon is turning orange to inform you that you are not allowed to modify it for any reason. Then, the only movable item is the map, so the user can still explore it (move, zoom-in/out) and can still import KML files.
When the flight plan is locked the following actions are prevented:
- Create a new area, corridor or loiter point, take-off point
- Move or change the shape of the already present flight item on the map
- Modify flight items and safety parameters on the planning area
- Modify the geobarrier
- Change flight items order using the drag and drop action in the planning area
- Add a new element by KML drag and drop
- Delete a flight item
Also, the padlock is automatically locked in the following states:
- Armed state
- Mission finished
- Elevation inspection mode enabled
To modify the flight plan you first need to unlock it by clicking on the padlock icon.
Flight planning on the field
As flight planning with WingtraPilot is very easy, we recommend planning easy flights directly in the field. Make sure you have internet access in the field, or download offline maps before going to the field.