Corridor mapping allows WingtraOne to fly in a linear pattern in order to achieve faster and more efficient mapping of roads, railways, and pipelines. The corridor area can be automatically extracted from a polyline KML file or it can be manually entered. The following concepts will be described in detail as part of the corridor flight planning process:
- Corridor area: the plan covering the entire length of the mapping project
- Segment: this is a straight linear section of the corridor—it can measure between 100 m (328 ft yd) and 5 km (16404 ft) and several segments can be contained in one flight
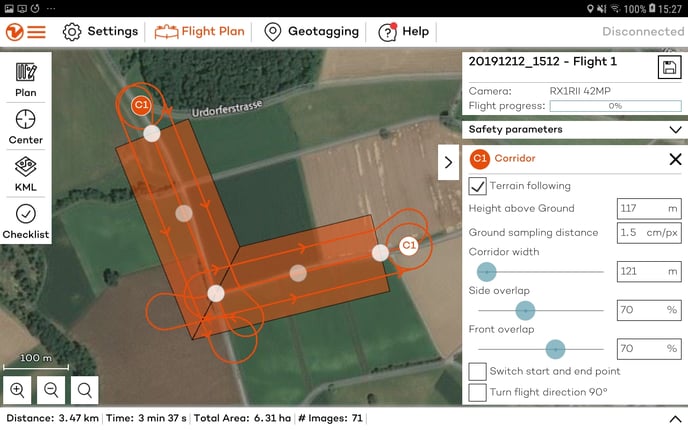
The corridor area is broken into segments according to the change of direction along the linear feature (a bend in the road, pipeline, railway track, etc.). WingtraOne executes the segments sequentially. The number of flight lines is always an odd number to optimize the flight time and to facilitate the transition between segments. For a narrow corridor, three flight lines provide sufficient data for a successful reconstruction.
The flight area indicated in the picture contains two straight segments that can be covered in one flight. The segments are covered by three flight lines.
The maximum length of a single segment can be up to 5 km. Longer straight stretches of the area being mapped will automatically be split into segments. The corridor plan reflects calculation of each segment given that those shorter than 100 m are not supported.
For mapping of corridors longer than 20-30 km, fetching the elevation data can be time-consuming. In such cases, split the project into several flight plans to optimize performance and prevent issues with loading elevation data in WingtraPilot.
 In case there is no KML file defining the polyline, draw the corridor by setting the start and end point and by adding and adjusting (see video at the end) points in-between.
Corridor project based on a polyline KML file
1. Import the polyline KML file, following the instructions of the Using KML files for flight planning article.
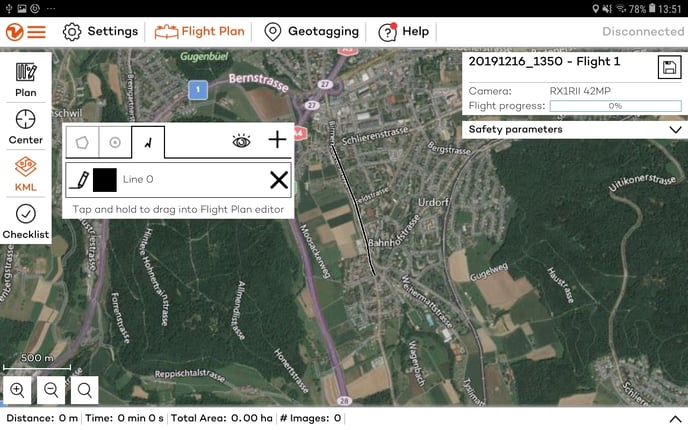
2. Tap on the polyline icon and drag and drop the KML into the flight planning editor. The KML will be transformed into a flight plan that follows the polyline.
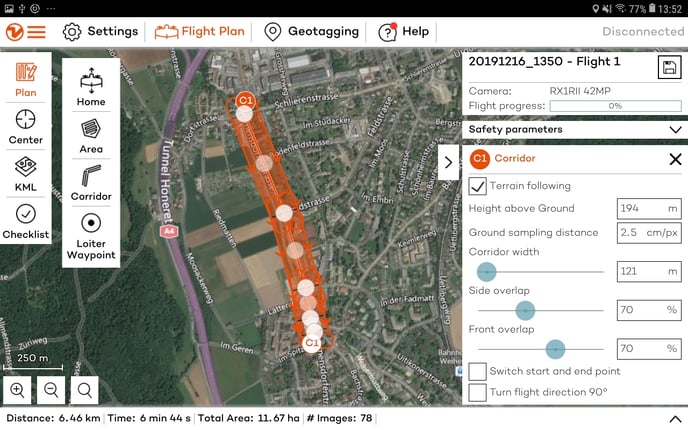
3. Modify the Corridor parameters to fit the project requirements
-
- Corridor width: defines the area to be mapped. The number of flight lines is computed based on this value. The default corridor width is 121 m that corresponds to 3 sweeps.
- Switch start and end point: defines the line from which WingtraOne will start mapping
- Turn flight direction 90°: sets the flight direction perpendicular to the linear feature
4. Modify or add corners to the corridor to better resemble the area. Do this by moving the middle point of a segment to another location. When you click on a start or endpoint of a segment, this will be removed.
Note: If the KML polyline consists of many points close to each other, WingtraPilot removes some of them while converting the polyline to a corridor flight plan.
Safety parameters for corridor mapping projects
The safety parameters ensure safe operation throughout the entire flight. For corridor projects covering relatively flat terrain and within visual line of sight (VLOS), you only need to adjust the min. and max. Height above ground based on your flight height, as it is explained in the Safety parameters
For long corridor projects, if flying beyond visual line of sight (BVLOS) is not an option, multiple home points can be set, and the operator should move between flights. If you are allowed to fly BVLOS, corridor lengths of 5-10 km can be mapped in one flight. You will need to take off from somewhere in the middle of the corridor and adjust the geofence so that it encloses the entire corridor. A polygonal geofence can be used to match the shape of the corridor. If you select the circular geofence, we recommend setting the home point into the corridor.
Step by step instructions on how to plan your corridor project before 2.7 version