WingtraHub can be installed on your desktop computer following the instructions of the article: Install WingtraHub.
Adjust WingtraHub geotagging settings
After selecting the language and accepting the Wingtra EULA, you can choose the desired format of the output *.csv file in the "Settings" tab. Please select the *.csv file style that matches your photogrammetry software or define a custom *.csv file selecting the parameters that you need. In the drop-down list, you can find Pix4D and Agisoft Metashape options. 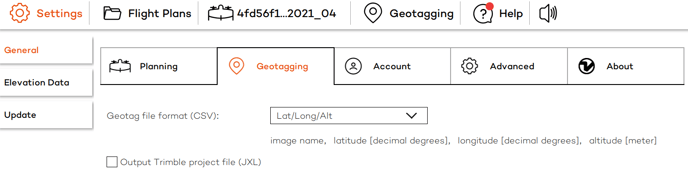
If you use a different photogrammetry software, you need to know the order of the parameters of the .csv file that the software accepts. Then, select in WingtraHub settings the Custom option from the drop-down list and click on the Pencil icon to edit the order of the parameters.
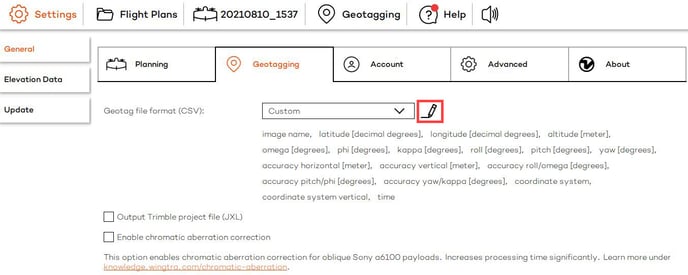
As soon as you set the parameters in the desired order, you can Save the new custom format that matches the input format of your software.
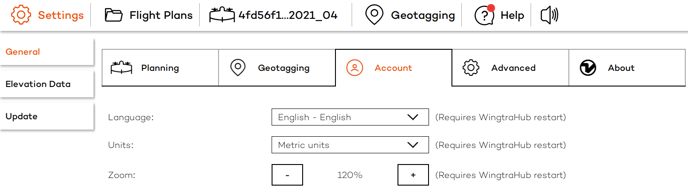
In the settings, you also have the option to change the display language below the Account tab.
Starting with the 2.12.1 version, there is no need to use the dongles and activate the license. Simply install WingtraHub 2.12.1 or a later version to perform PPK geotagging.
(Obsolete with 2.12.1) Insert one-time license activation USB stick and PPK license USB stick
Insert the two USB sticks (dongles) from your PPK kit into your computer. The orange one-time license activation USB stick will only be needed for the setup and can be removed from your computer after this tutorial. The grey PPK license USB stick needs to be inserted into your machine whenever you process PPK data.
Note: The 2 USB sticks are paired—make sure you use the grey USB stick in the computer with the license activated by its orange one-time license USB pair.
/images/hardware/septentrio_dongles.png)
Tutorial and activation
Download the WingtraHub tutorial data from here.
Process the downloaded sample images to finalize the setup and learn to process your WingtraOne PPK data. Note that the provided images included in the WingtraHub download are thumbnails only. The full resolution tutorial dataset can be downloaded from here.
- If not opened already, start WingtraHub and go to "Geotagging".
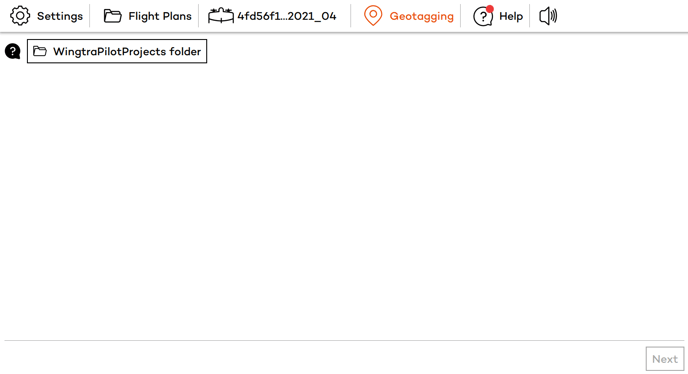
- Click on the downloaded "WingtraPilotProjects" folder, which contains the tutorial project and then click "Select Folder" on the lower right to proceed.
/images/screenshots/WingtraHub0.4.0/wih_install3.png)
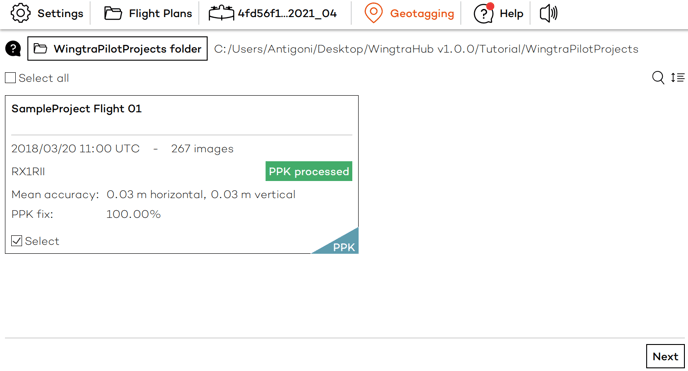
- WingtraHub will display all projects within your WingtraPilotProjects folder. If you have more projects you can sort, arrange the projects in a desired order or search for project names. Select the sample project and click "Next" to reach the processing page.
- On the lower-left corner click on "Select license file." Browse to the USB stick (only one USB stick named "Septentrio" will be visible). Then select the file within the "License" folder.
- Once you have selected the correct license file, WingtraHub will display "PPK ready" towards the bottom left.

- You can now unplug the orange dongle. Keep it in a safe location in case you want to process PPK data with its paired grey dongle on another machine in the future. The grey dongle always has to be plugged into the computer in order to run PPK processing. We recommend you keep this dongle inserted in the computer you use to regularly process data.
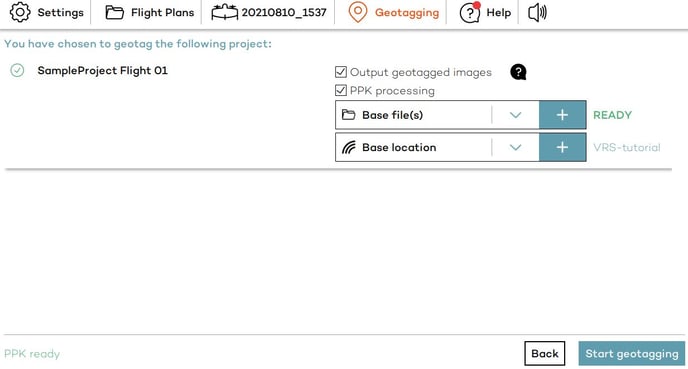
- For your sample project, make sure the option "PPK processing" is activated. Select the base files (RINEX). You can find them in the base folder, with the WingtraPilotProjects folder inside the downloaded tutorial. Select all available RINEX files.
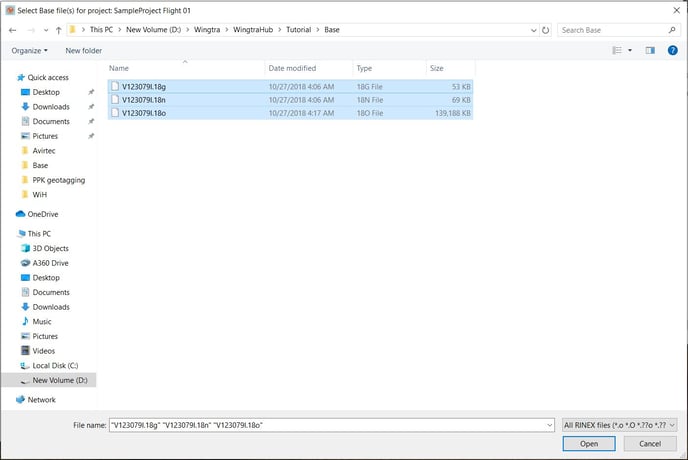
- And click "Select".

- Wait for the base files to be pre-processed for potential errors and warnings. As soon as the pre-processing of the base files is successful, the message READY will show up.
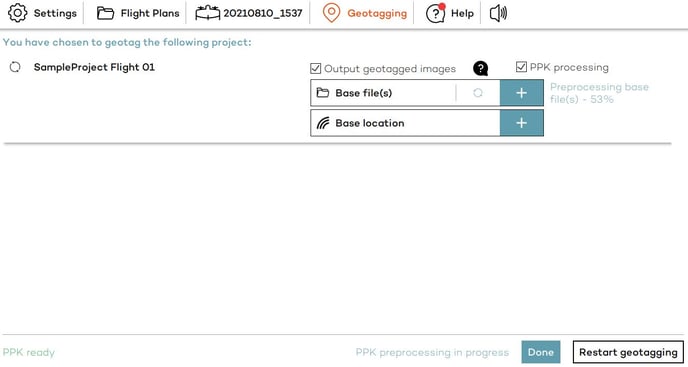
- Define the base location. Click on the + icon next to "Base location" and then click on "Add new."
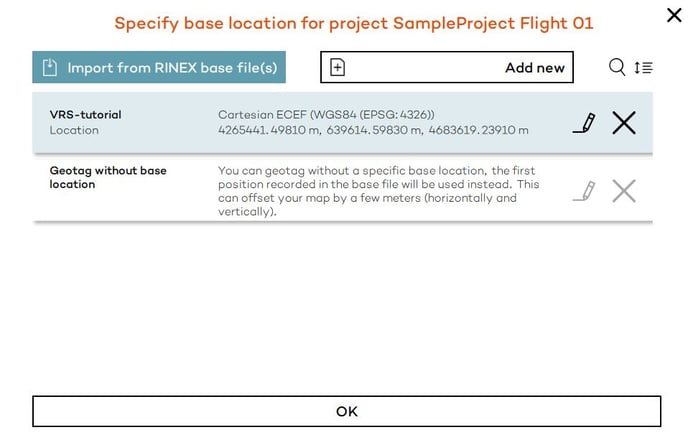
- Add a new base station location and give it a descriptive name—WingtraHub will remember your base locations. You can find the base coordinates for the sample project in a text file within the "/Base" folder of the tutorial. The base location can be entered using cartesian or geodetic coordinates. Click the question mark icon to get some tips regarding the selected coordinate reference system, the antenna height and type.

- Once the coordinates are entered press "Save" and select the newly created base location in the base location selector.
- Click "Start geotagging" in the bottom right corner and observe the processing steps. For batch processing of several projects, WingtraHub will automatically process one project after another.
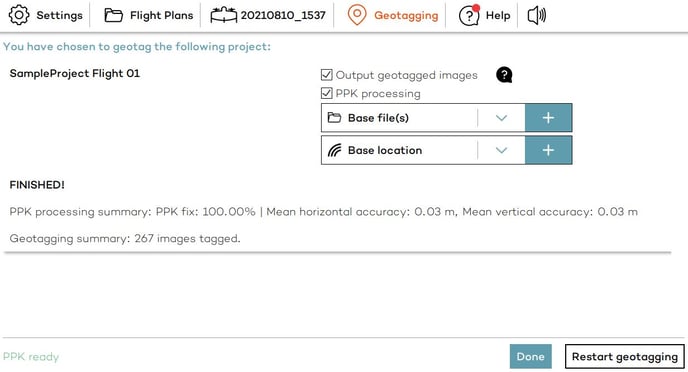
- Have a look at your results. WingtraHub will display the PPK fix percentage and the horizontal and vertical accuracies for each project individually. To access the full output, navigate to /WingtraPilotProjects/SampleProject Flight 01/OUTPUT and inspect the geotag pdf report, the geotags.csv file, and the geotagged images (optional). Use the images and the .csv file for processing in Pix4D, Agisoft Metashape or your choice of compatible post-processing software.
Finished! Go flying and process your first PPK projects
Now that you successfully completed the WingtraOne PPK tutorial, you are ready for your first real project. Take WingtraOne out on one or several flight(s), insert the camera SD card into your computer, select the /WingtraPilotProjects folder on the SD card and run geotagging accordingly. More information about geotagging (e.g. batch processing) can be found here: PPK Geotagging, Non-PPK Geotagging. For different options on how to provide your base files (RINEX) and base location, check out this PPK base station article. To learn how to process the geotagged images in a photogrammetry software, read this Image post-processing article.