Cameras
Your mapping and output requirements will determine the most suitable camera.
If your goal is to create a photorealistic 3D digital twin of the pit or the whole mine, the best option is to use an oblique camera if you are a GEN II user, or QX1 if you are flying a GEN I unit. Due to their capabilities, these cameras are optimized for mapping vertical structures, such as pit walls and facades.
If you are looking to create orthomosaic or volume calculations, where the camera resolution is crucial, the best choice is the Sony RX1R II, since you will get the best results with its full-frame 42MP sensor.
Mapping vertical structures is also feasible with the RX1R II camera. In that case, cris-cross mapping is recommended.
Flight planning
Setting the home point
Machinery, vehicles, communication towers, and mining facilities could potentially be sources of electromagnetic radiation. As part of the preflight checks, the drone will measure the magnetic field, and if it is too strong the take-off will be prevented. To avoid such issues, set the home point in a location far away from strong magnetic sources.
To avoid potential telemetry interference, we recommend choosing an elevated area for the home point. In this way, there will be a direct line of communication between the ground communication unit and the drone, which will prevent telemetry losses.
Setting a mapping area
As the pit contains vertical structures and cliffs, flight planning with the RX1 or nadir a6100 cameras requires a specific approach. We recommend criss-cross/cross-hatch mapping—i.e., two overlapping plans with flight lines running perpendicular to each other. You can run both plans in one flight or split them in two depending on the size of the area.
Thanks to the design of the Oblique mount with a similar field-of-view to the side and to the front, you do not need to fly cross-grid when flying with oblique payload.
Flight 1. Set the flight lines so they are parallel to one of the pit axis

Flight 2. Set the flight lines so they are rotated 90 degrees compared to Flight 1
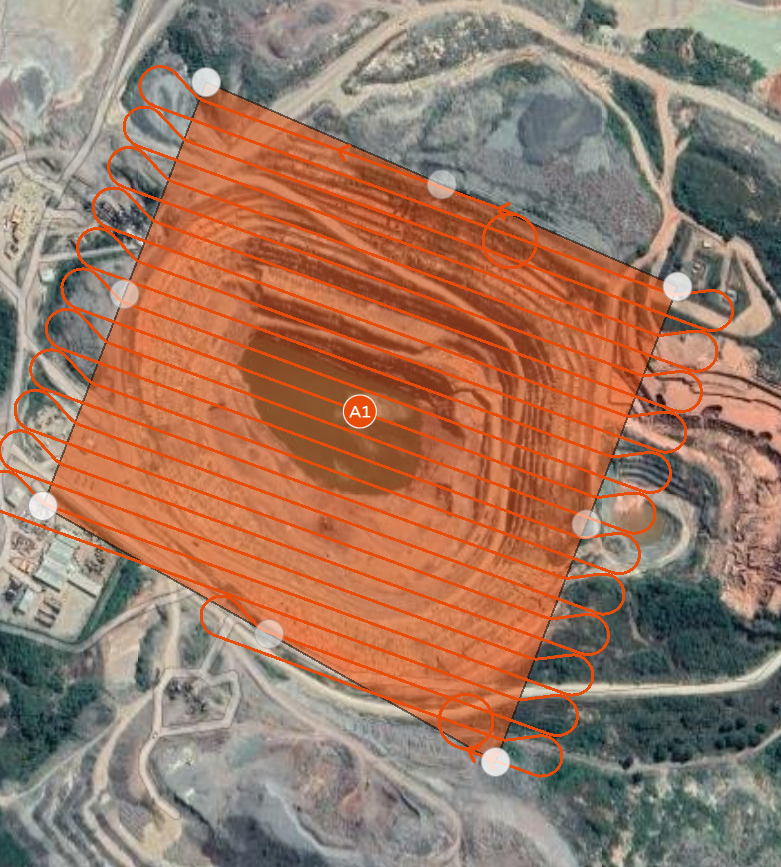
Combined flight. To optimize for time, you can fly both in the same plan
With criss-cross data capture, the images of the walls will be taken from different angles. All the details will be covered and well-reconstructed. You can use the same pattern for each pit you need to map.
WingtraOne can map multiple pits within a single mission. If you do this, the path from one area to another will be defined by a waypoint, so make sure you place it in a location that enables a safe path from one area to the next. For more about waypoints, check here.


Alternatively, you can map the whole mine area by setting a single polygon.

As mines can be huge, make sure you read the knowledge base article explaining how to plan such flights in the right way.
Safety parameters
For safety reasons, flying only over the pit (not inside it) is highly recommended. Keep in mind that WingtraOne needs to turn at the ends of the flight lines, which could be risky in case the drone is inside the pit. By flying above the pit, the drone will have good clearance, and you avoid the risk of crashing into walls.
Likewise, pay extra attention if you want to map regions in which the terrain is changing substantially. For such situations, increase your flight margins—i.e., get a feeling for how much your terrain differs from the SRTM database and adjust the minimum height above ground accordingly.
Keep in mind the resolution of the elevation data which WingtraPilot uses by default is 30m, so in case you are unsure about its reliability ( e.g., the terrain has changed due to intensive earthworks), consider disabling the terrain following and using the ground elevation offset feature for your flight. Or you can use the terrain following feature and import your own elevation data. In any case, always account for some additional space at the change of sweeps.