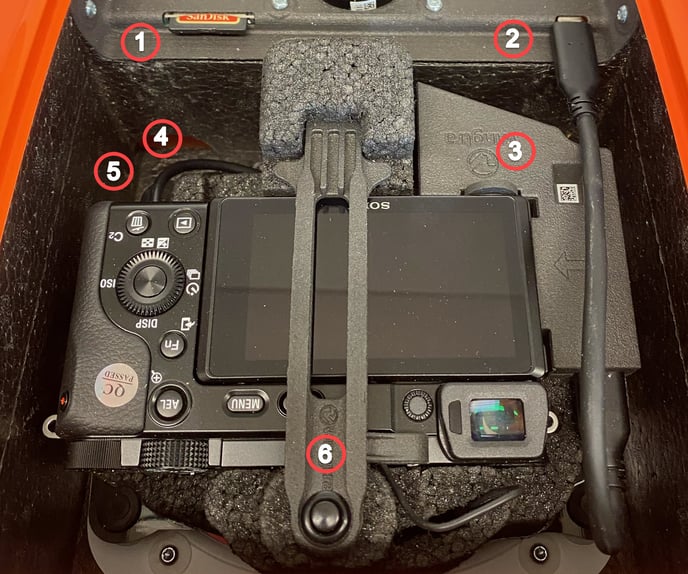
- The WingtraOne SD card is used for downloading the flight logs and for updating the WingtraOne firmware
- Universal payload connector (USB-C)
- Multiport connector
- SD card slot, for more details about the SD card, please check the article WingtraOne SD cards
- Battery compartment - the camera is coming with a dummy battery
- The camera holder beam is used to fix the camera and should not be removed when flying
This camera will be called ILCE-6100 in some third-party tools (e.g. in Pix4D).
Camera settings
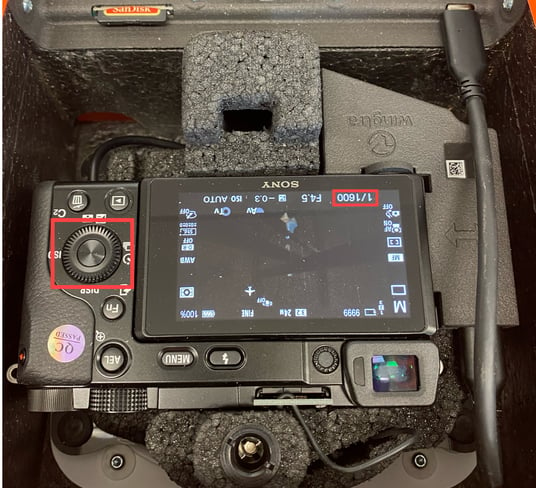
The camera is shipped with the following default settings:
-
Auto ISO - the maximum ISO the camera adjusts to is 6400.
-
Shutter time 1/1600
-
Exposure composition -0.3
-
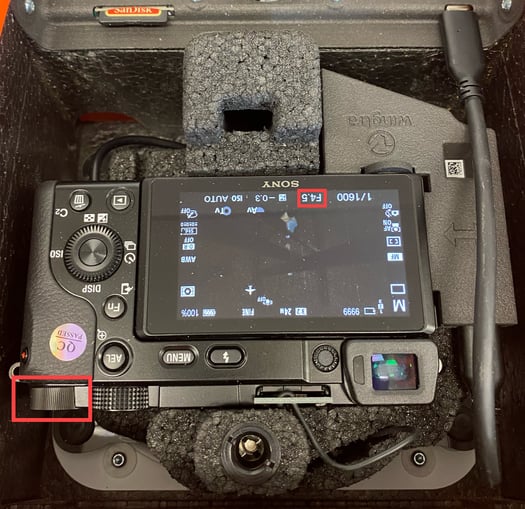
Aperture f/4.5
-
Manual Focus
- Image Format and Quality -JPEG fine.
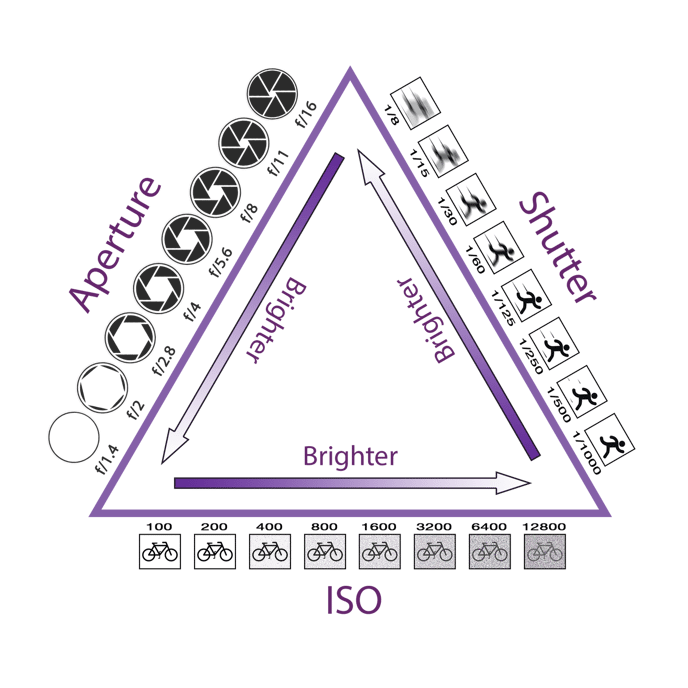
The default settings provide very good results in a wide range of light conditions. In case of very dark or bright conditions, you need to adjust the shutter speed and the aperture opening. Here is an image depicting the relationship of the exposure triangle:
Adjust camera settings
The camera settings can be adjusted while the camera is in the drone, by powering on WingtraOne. To adjust the settings for one flight only, wait until the camera check in the preflight checklist is green and then press the Menu button and adjust the settings. For permanently storing the new settings, before powering the drone make sure the multiport connector is unplugged. Then, press the Menu button on the camera to view and adjust most of the settings.
To use different settings in flight, you have to store them as memory recall function and adjust the mode dial to the respective number. Set the mode dial to "MR" and adjust the desired settings on the camera, like file size, compression, metering mode, WB, shutter priority, or image quality. Go to the image settings (Menu > camera symbol > tab 4/11) and select Memory. Turn the menu dial to to access the desired register 1, 2, or 3 and press the round button in the middle of the menu dial. To save the settings permanently, turn the camera off manually using the on/off switch of the camera. Wait 5 seconds and turn it back on.
The default settings are stored in mode 2. Do not overwrite the settings in this mode.
The aperture and exposure can be changed using the mechanical dials on the camera. These settings need to be mechanically adjusted and can not be saved to a mode.
In case of dark conditions, you can increase the shutter time to 1/1100s or open the aperture, e.g. to 2.8, so that the ISO is maintained low. To modify the shutter time rotate the wheel next to the display of the camera clockwise and set to „1000“. The current value is displayed on the camera screen.
To change the aperture opening, turn the wheel on the top right of the camera to „2.8“. You will see the aperture value at the bottom of the camera screen (f-number).
For more information about the camera, see the official Sony Documentation.