Skip to content
English
  • There are no suggestions because the search field is empty.

Insert the RedEdge-P camera into the mount of WingtraOne GEN II 

Learn how to place a RedEdge-P camera into a new mount.

Time required 15 min
Difficulty Easy
Equipment RedEdge-P camera, DLS sensor, prepared tower, prepared CCU, M3 screws, W86 mixed harness, USB-C to USB-C cable, T6 screwdriver, TX10 Torx screwdriver from pilot box, RedEdge-P mount


all items 

Step-by-step instructions

step1
  • Take the tower with the cable and plug the top connector of the cable into the DLS sensor
step 2-1
  • Place the DLS sensor on top of the tower so that the connected cable is not visible
step 3-1
  • Take the T6 screwdriver and tighten the screws from inside of the tower, at the locations indicated in the picture (you might need to adjust the DLS so that you can find the holes with the screw)
step 4
  • Take the camera and place it so that the SD card slot is on the left side

  • Take the camera control unit (CCU) and place it on top of the RedEdge-P so that the Wingtra logo is readable

  • Take two of the M3x10mm screws and screw them on the top and bottom positions as indicated in the picture (use the T10 Torx screwdriver from the pilot box)
step 5-1
  • Place the tower with the DLS on top of the camera with the cables on the right side as pictured
  • Screw the remaining 2 M3x10mm screws
step 6
  • Plug the other port of the tower cable into the DLS port of the camera
step 7
  • Take the other cable and plug the single-side connector into the white plug of the CCU in the tower
step 8
  • Plug the other 2 connectors on the camera PWR and COMM ports
step 10
  • Place the camera into the RedEdge-P GEN II mount
  • Press the buttons on the beamer to lock the camera to the mount
step 9
  • Plug the black USB-C to USB-C cable to the port on the tower

To place the RedEdge-P attached to the mount into the WingtraOne GEN II drone, follow the steps below:

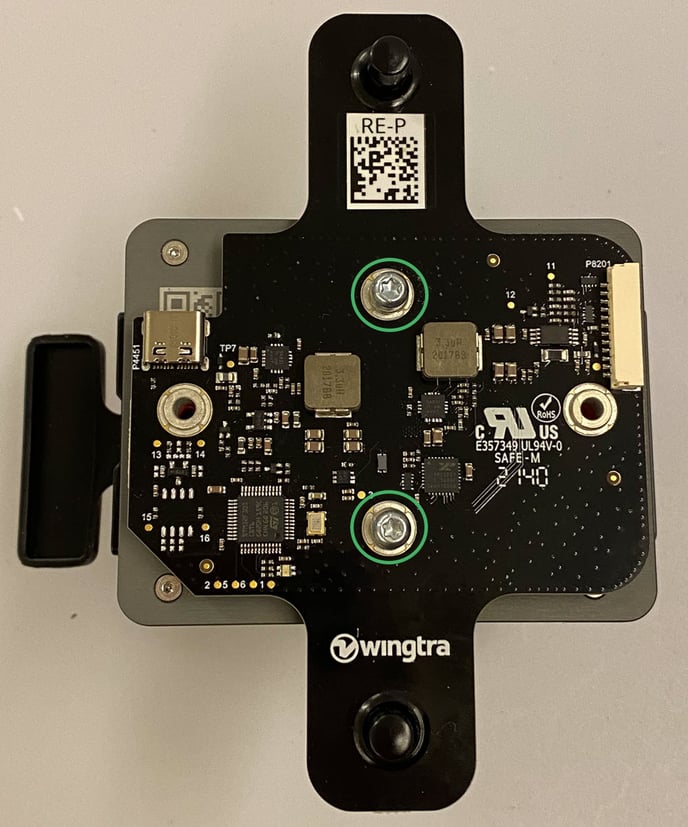
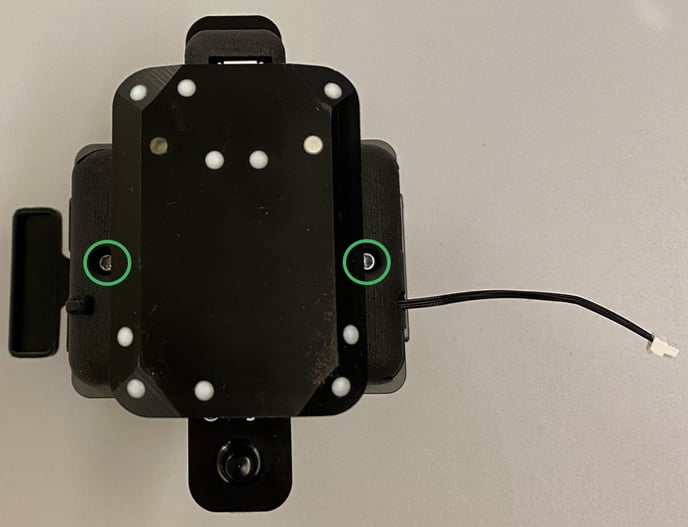
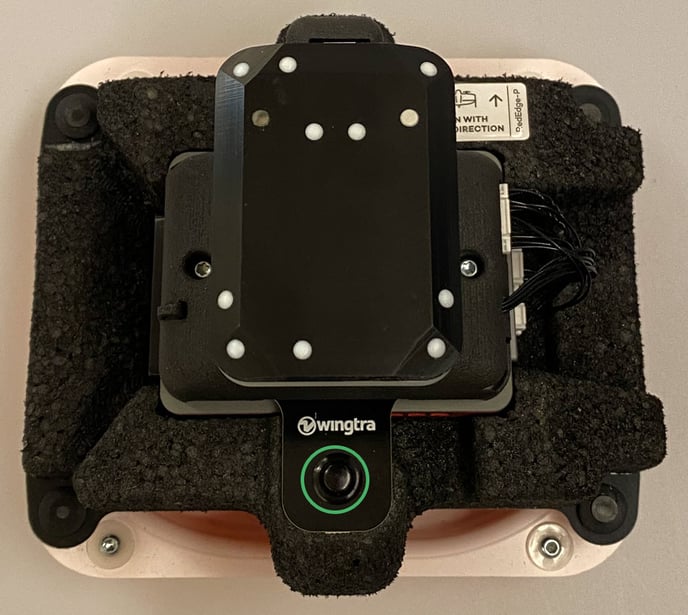
  • Use the T10 Torx screwdriver to tighten the four screws in the four corners of the payload area. Make sure you don't overtighten them (maximum torque 0.4 Nm - use two fingers tightness).
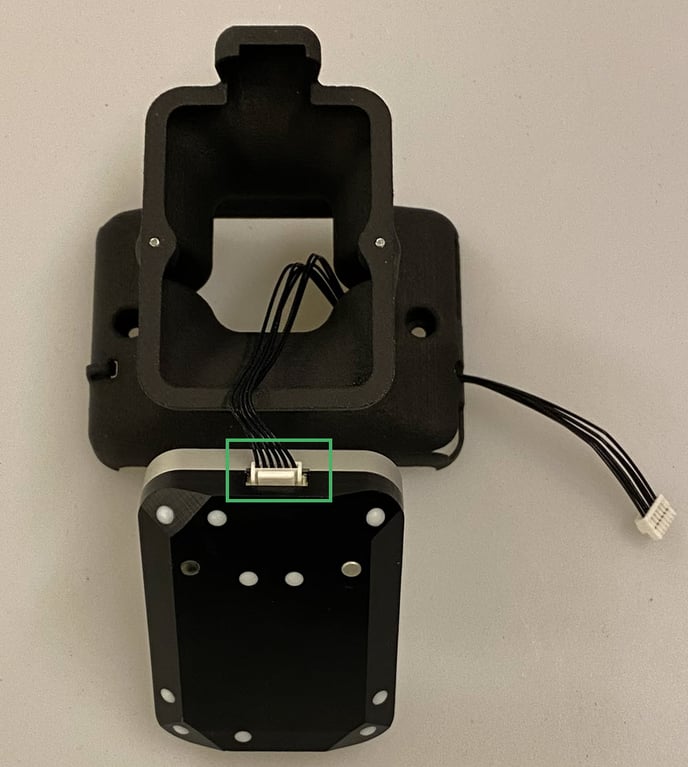
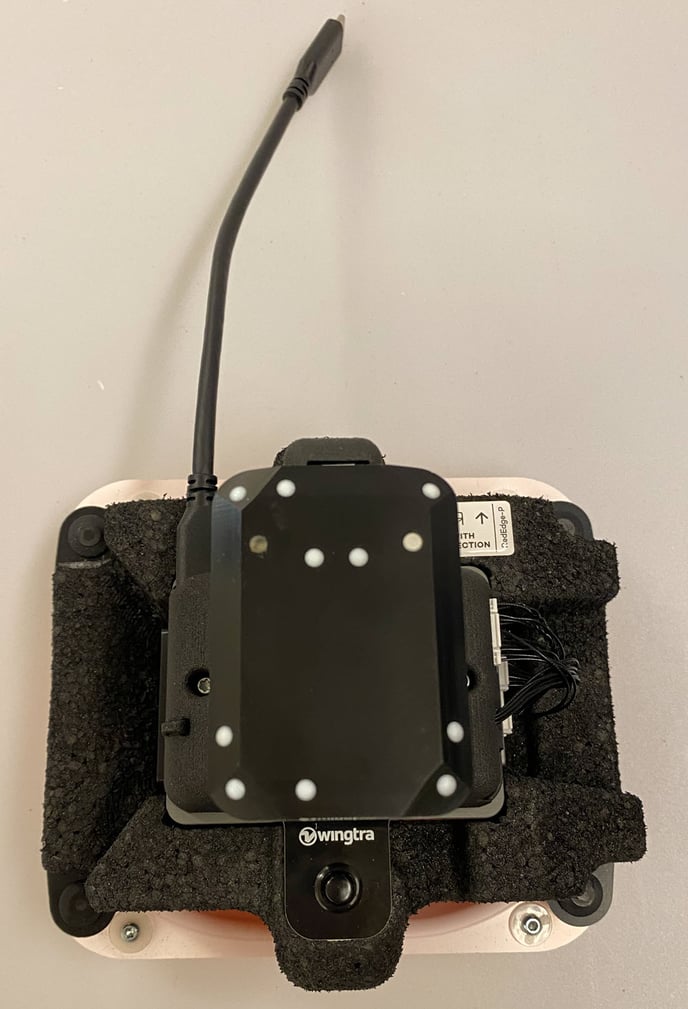
  • Plug the USB-C universal payload connector into the drone
  • Close the top cover