To process a project with Pix4Dmapper please follow the step-by-step instructions. You may use download a dataset from this link.
General recommendations
- WingtraOne datasets, in particular from its Micansense Altum sensor, can be very large. Please make sure to have enough computing resources available.
- We recommend >= 32GB RAM, >6 core and enough high-speed SSD storage. For complete specifications, please refer to the Pix4D support page.
- We recommend processing the multispectral bands and the thermal on different projects. Steps 1 through 7 are for multispectral mapping and Steps 8 on are for thermal mapping.
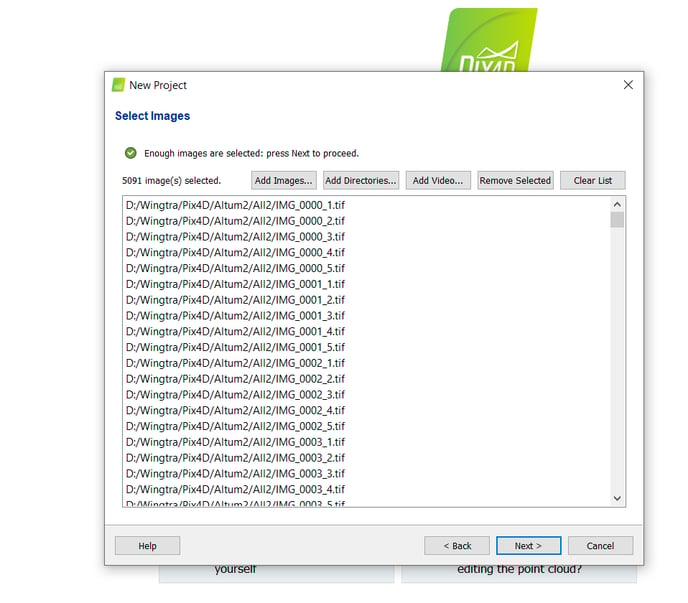
Step 1— Open Pix4D Mapper and create a new project
/images/screenshots/Pix4D/Pix4D_processing_newproject.png)
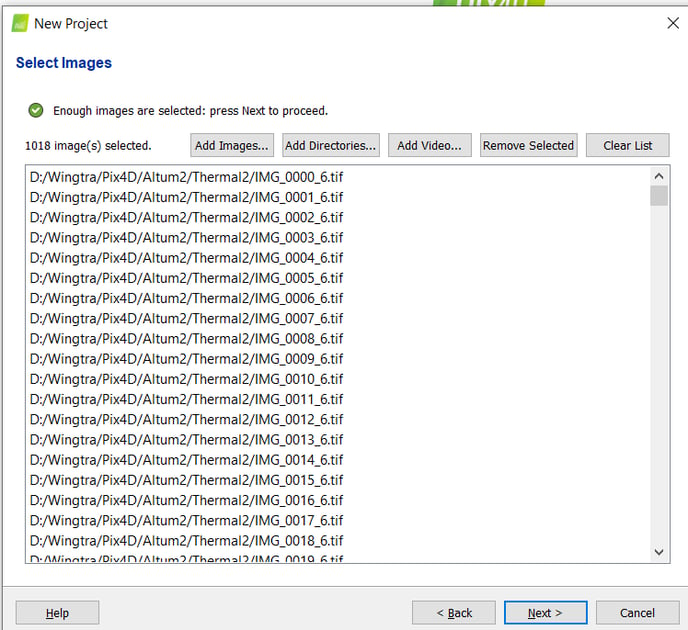
Step 2— Select images
Click select images or select directories to add either specific images or all images inside one folder. You may incorporate images from multiple projects by adding them subsequently.
Step 3—Radiometric Calibration
In order to compare the information to other measuring tools, to satellite imagery, or even to compare through time, it is important that the images are calibrated radiometrically.
See this article to understand how to use the calibration panel.
For this select theIndex Calculator tab:
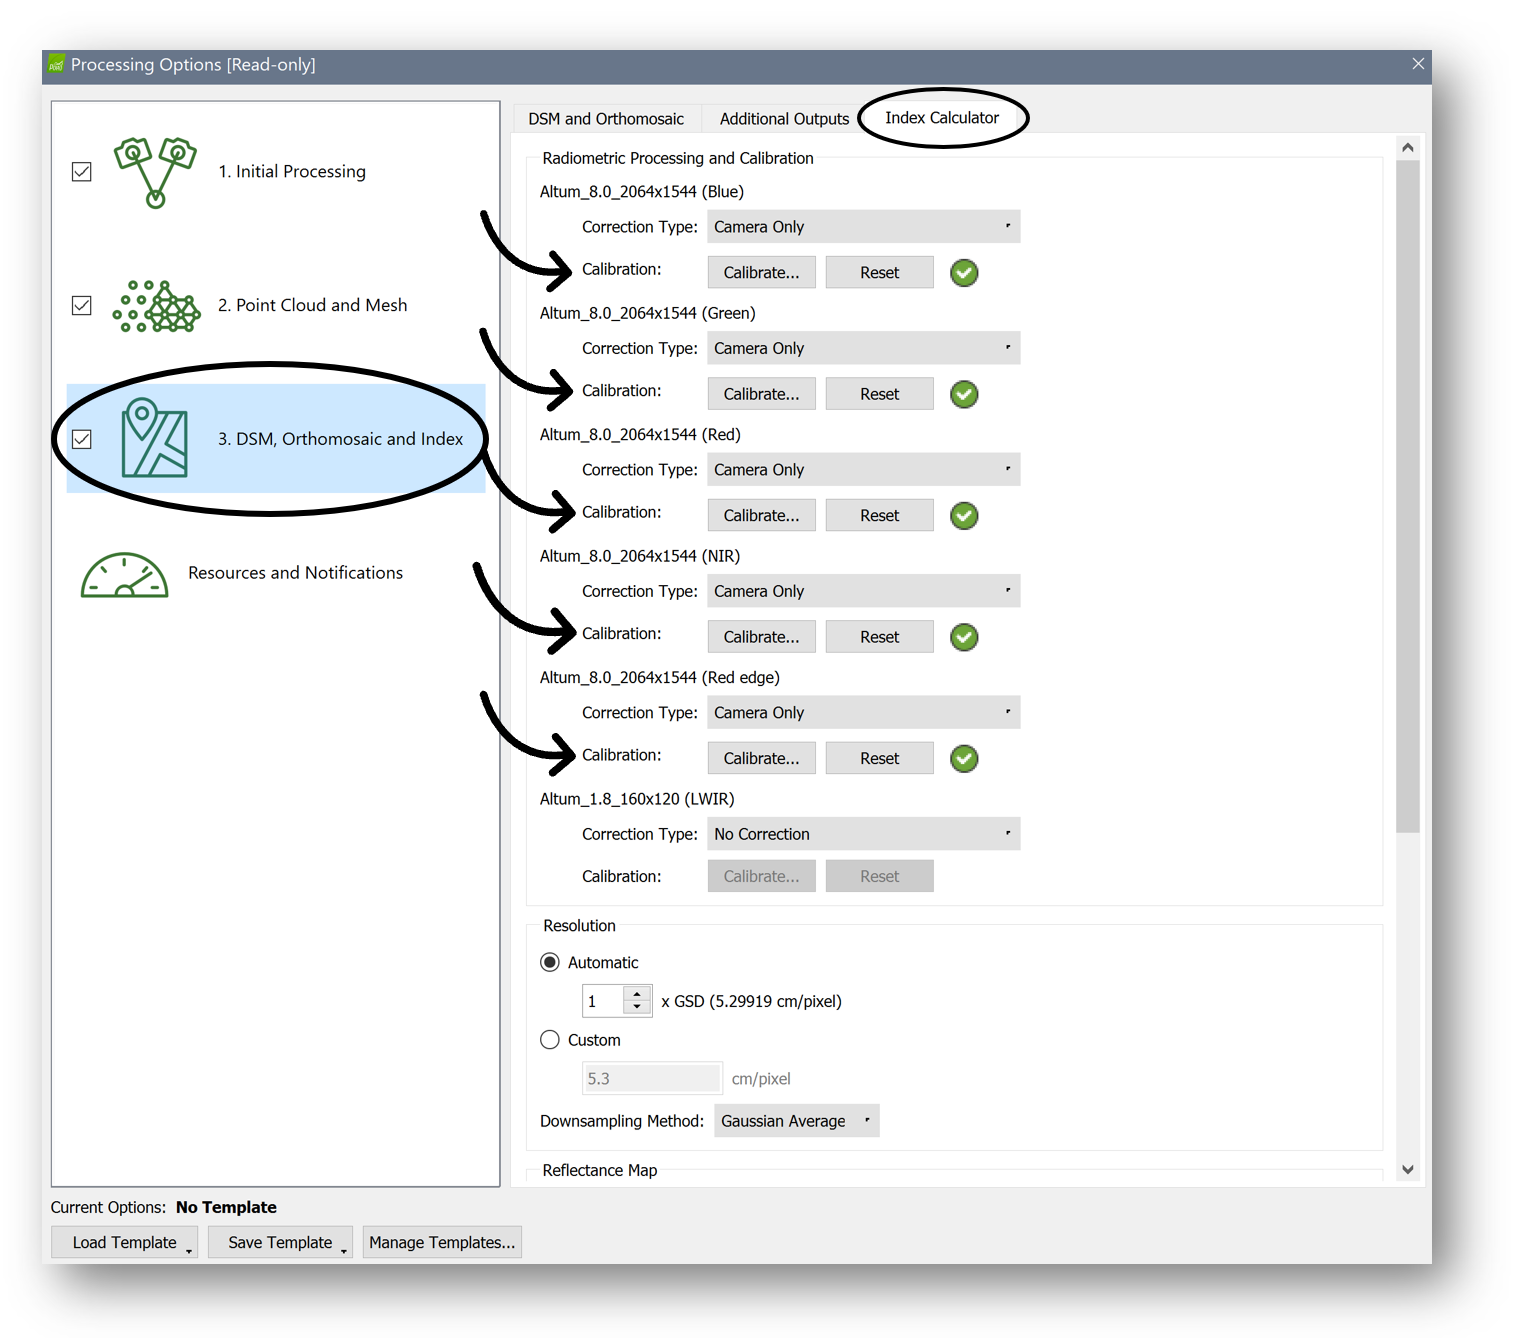
Under Radiometric Processing and Calibration, you can choose the following options (some of which may not be available for MicaSense sensor data):
- No correction: no radiometric correction will be done
- Camera only: corrections will be applied for the parameters that are written in the EXIF metadata and relate to the camera (vignetting, dark current, ISO, etc...). This will still use the calibration panel images.
- Camera and sun irradiance: corrections will be applied for the camera parameters from the point above as well as for the sun irradiance information written in the XMP.Camera.Irradiance EXIF tag. Use this option to include data from your DLS.
- Camera, sun irradiance and sun angle: corrections will be applied to take into account the sun position, as well as the camera information and the irradiance data. This option should only be chosen for flights that were done in variable sky conditions.
Important: Since the thermal imager in Altum is already radiometrically calibrated, you should choose the correction type No Correction for the LWIR band.
We recommend to also navigate to DSM and Orthomosaic, and check Raster DSM (merged tiles) and Orthomosaic (merged tiles) so that you will have additional outputs to use. These are optional, but can be very useful for additional analysis.
Using the Calibration Panel
The Calibrate button allows users to take into account the information from a picture with radiometric calibration target if such a target was used during the project.
Obtaining your panel's reflectance values
If you have a MicaSense Reflectance Panel, you can get the reflectance values for your panel by filling out this form.
Step 4— Define output coordinate system
Select your desired output coordinate system. In case you want to import GCPs or checkpoints, the output coordinate system needs to be the one in which you measured your ground control points. Note: you can change it later when importing the points.
/images/screenshots/Pix4D/Pix4D_processing_selectoutputcoordinate.png)
Step 5— Select processing template
Select your desired processing template, which defines the resolution and quality of the output, the required computing resources, and the desired outputs of processing. For agricultural maps, use the "Ag Multispectral" setting. The processing options can be changed after you've pressed Finish and stored your project as a personal template to be directly accessible in the future.

Step 6— Generate basic output
Now you can start the processing. Make sure to have all three process steps selected, and start the processing of the project by clicking Start.
/images/screenshots/Pix4D/Pix4D_processing_start.png)
Step 7—Generate indexes
To generate indexes, go to Index Calculator on your left and then click on Generate. Once it is generated, you can create your index Map according to what you need
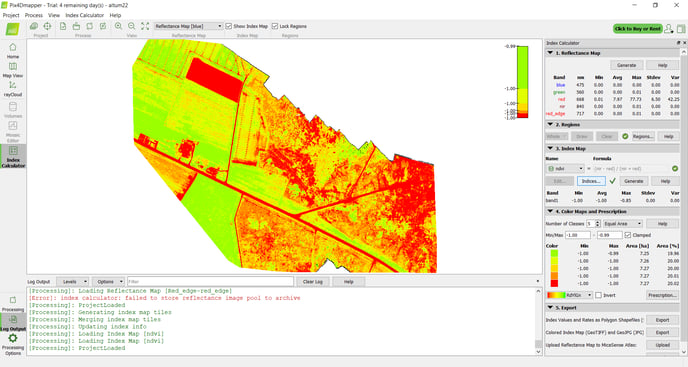
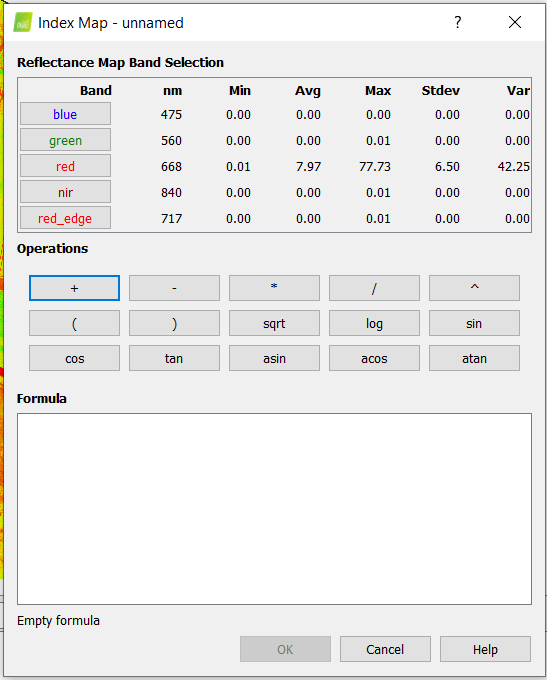
Step 8—Indexes and formulas
Under Index Map you can change the formula and create an NDVI, NDRE, OSAVI or whichever map you're looking for. You can change the colors as well as the number of classes in order to have more detail.
Step 9—Create Thermal Map
Click Select Images or Select Directories to add either specific images or all images inside one folder. Make sure they are the file ending in _6.
Step 10—Generate Thermal Map
Run steps 3 and 4, choosing Thermal Map under Processing Options Template instead of Ag Multispectal. Click Start and process the images. When finished, click on Index Calculator.
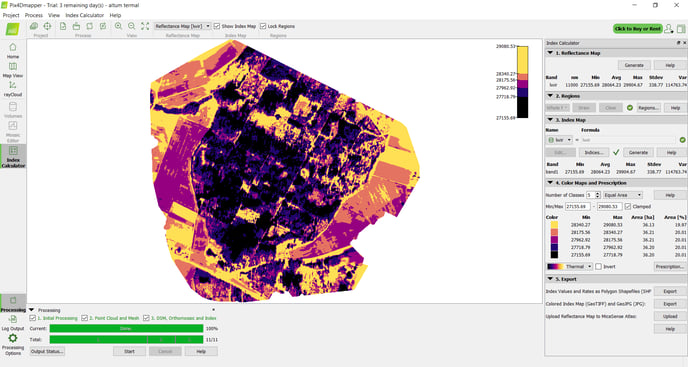
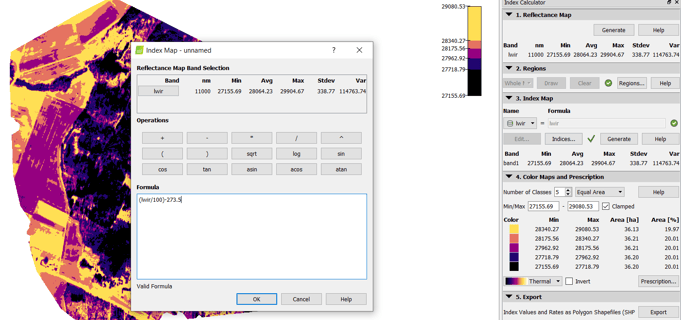
Step 11—Calculate temperatures
Just like in multispectral, you can change the colors and specify the range. To convert the LWIR pixel values to degree C, use the formula: Thermal_ir=(lwir/100)-273.15.