This process should be carried out by all customers themselves. Wingtra's warranty is not affected by this replacement.
Step by step instructions
Step 1 Open the top cover

Step 2 (Optional) Remove the PPK module or RGB camera
- You can find step-by-step instructions on how to remove the PPK module in the article: Remove the PPK module
- You can find step-by-step instructions on how to remove the camera in the article: Changing from RGB to RedEdge camera
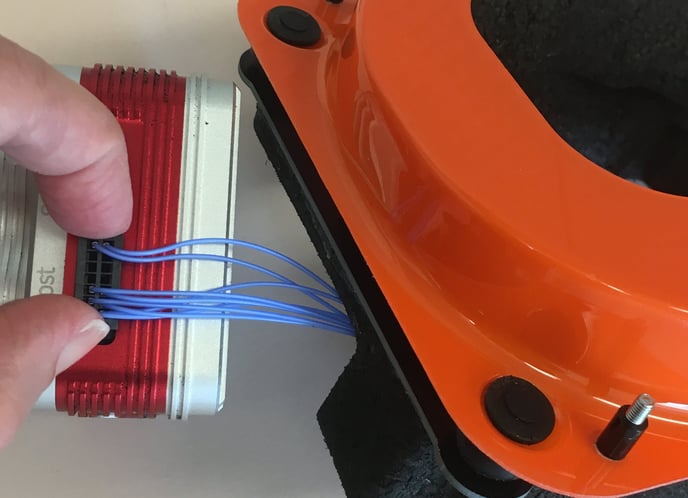
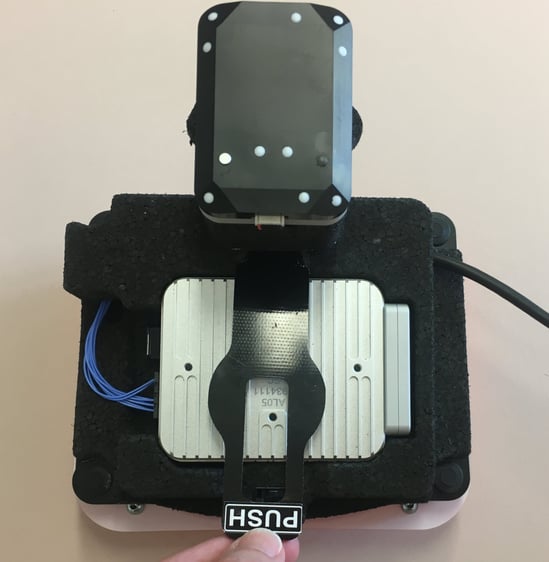
Step 3 Insert the Altum camera into the mount

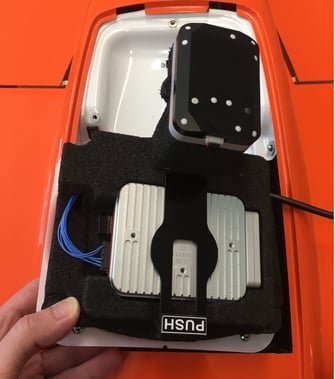
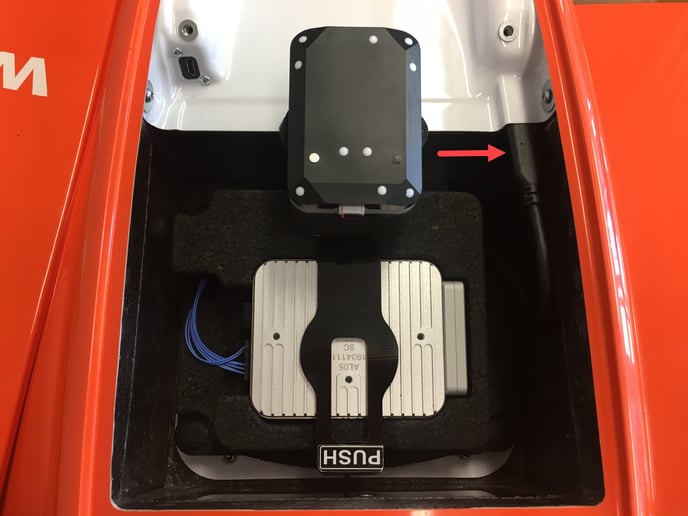
Step 4 Insert the Altum camera with the mount into WingtraOne

Step 5 Close the top cover
- Close the top cover.
Step 6 Finalize the new camera setup
- Power on the WingtraOne.
- Open the WingtraPilot app and connect the telemetry antenna to connect to WingtraOne.
- Create a new flight plan and make sure to select the right camera when going
through the wizard. - The new Altum camera will be detected and WingtraPilot will prompt you to repower WingtraOne to initialize it correctly.
- Confirm by clicking "Yes" and repower the WingtraOne.