A situation where this procedure is needed is if there are size restrictions in the SW you want to import the TIFF into for example AutoCAD. Instead of having to process the orthomosaic in the photogrammetry SW multiple times you can process once and then edit the orthomosaic into different output deliverables. For example, if you want to deliver high, medium, and low resolutions the data can be digested in multiple ways.
Let's first start with understanding the variables that influence file size in the photogrammetry SW for orthomosaics.
Resolution: Defines the spatial resolution used to generate the orthomosaic.
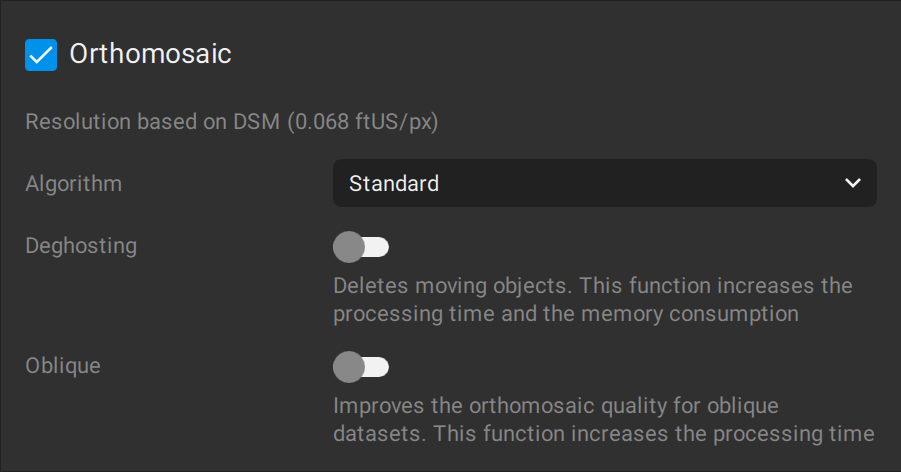
The orthomosaic resolution is the same as the resolution of the DSM. For example, if the DSM resolution is set to 5 cm then the orthomosaic resolution is also 5 cm. In the screenshot here using Pix4D under Orthomosaic you will see a value of 0.068ft.
In Pix4DMatic you can export the orthomosaic in JPG or Geotiff. For JPG you can control the quality in % and the image size in L, M, S. 90% is default and large.
TIFF is the suggested output for this workflow - Images exported as a single .tiff file include overviews (pyramid of resolution) so that they can be opened instantly and efficiently in other compatible third-party software (i.e. QGIS). By default, this is not selected so you need to specify the export before processing. File > Export orthomosaic.
The following export settings are available in Matic.
LZW compression - No data is lost during the compression of the file and the .tiff is not degraded. This results in a smaller file size of the exported file. This is suggested to keep enabled.
File type - export as a single file or tiled. You can specify the tile size in 1024, 2048, and 4096.
Image scale - Defines the scale, 100% keeps the original size or you can half and quarter the size.
You can adjust the output resolution compression, file type, and scale through these settings to get the data into your desired format. If you need to deliver multiple different types then it may be quicker to adjust in a 3rd party SW than processing multiple times. It is suggested to leave the settings on default and process at high resolution then we can modify it down to fit needs.
QGIS Workflow
Open up QGIS and drag the processed orthomosaic from the Matic project into the project. To find the ortho it is located in the project folder under exports.
There are a few different parameters that can be changed to reduce the file size in QGIS. The 2 methods we are going to use are lowering the resolution and compressing the file.
To access these parameters right click on the raster layer then click export > Save As.

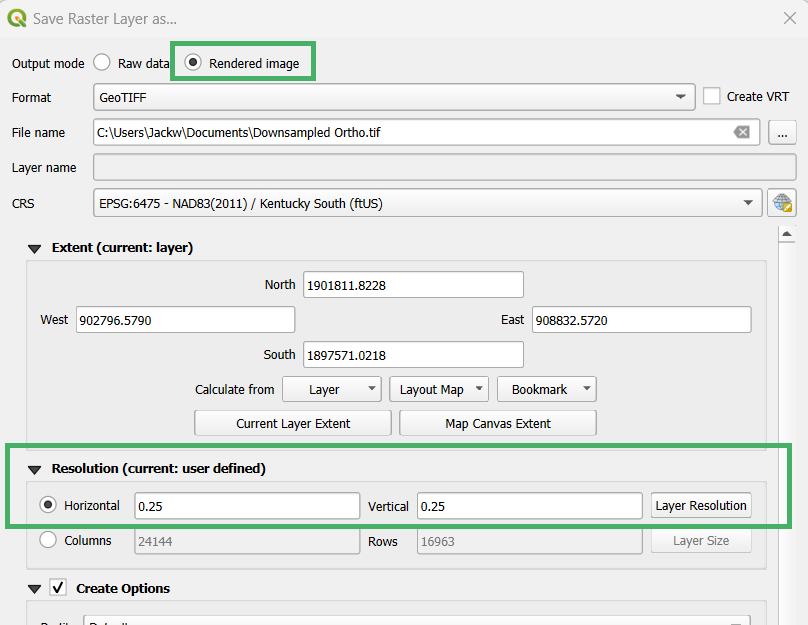
Under resolution in meters specify the desired resolution. Remember that the coordinate reference system will define the measurement unit type (ft) vs. (m). Be sure to enter the value in the correct units.
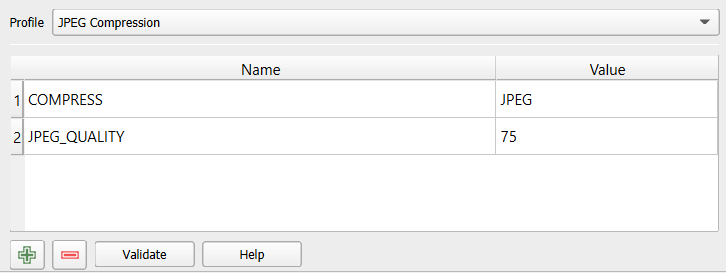
JPG compressions are suggested if you need to reduce the file size. There are pre-selected profiles available under the dropdown menu under 'Advanced parameters.'

You can change the quality parameter going lower than the default 75 which will reduce file size more but lose more detail.
JPEG QUALITY = 75
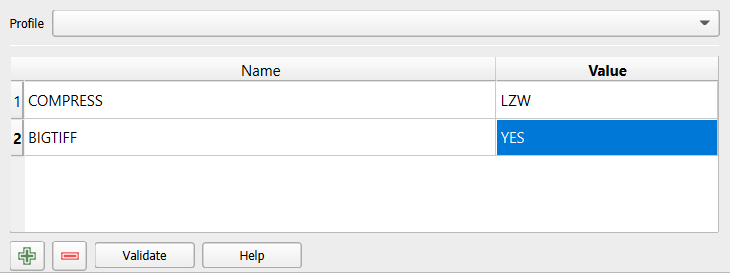
To match the LZW compression click the green plus symbol then enter 'COMPRESS = LZW' + 'BIGTIFF = YES' under the advanced parameters section instead of selecting a profile. This will keep the file size relatively the same as the input from Pix4D which uses the same compression type.
For more information on Pix4D’s recommendations for import into AutoCad review their article How to import Pix4D outputs to Autodesk + Very Large Ortho import to Autocad. Also checkout propeller Aero’s video guide.