
Learn how to setup your MicaSense RedEdge camera.
The WingtraOne RedEdge offers multispectral image acquisition. The camera acquires five individual images at the same time in spectral bands of blue, green, red, red edge, and near-infrared (near IR). For camera specifications, technical details, and camera related support, please refer to the Knowledge base of Micasense.
For more details about how to set up the RedEdge camera and what are the main parts, depending on the WingtraOne you use, please check below:
- Set up for WingtraOne GEN II RedEdge
- Set up for WingtraOne GEN I (868/900MHz and 2.4 Ghz telemetry) RedEdge
- Calibration panel
Set up for WingtraOne GEN II RedEdge MX
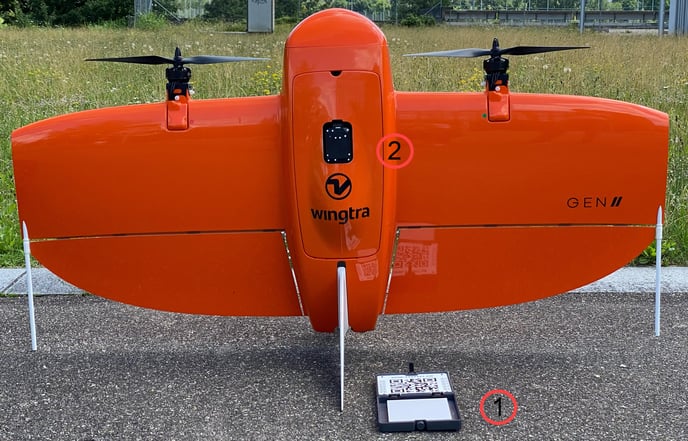
- Calibration panel
- Top cover for RedEdge camera
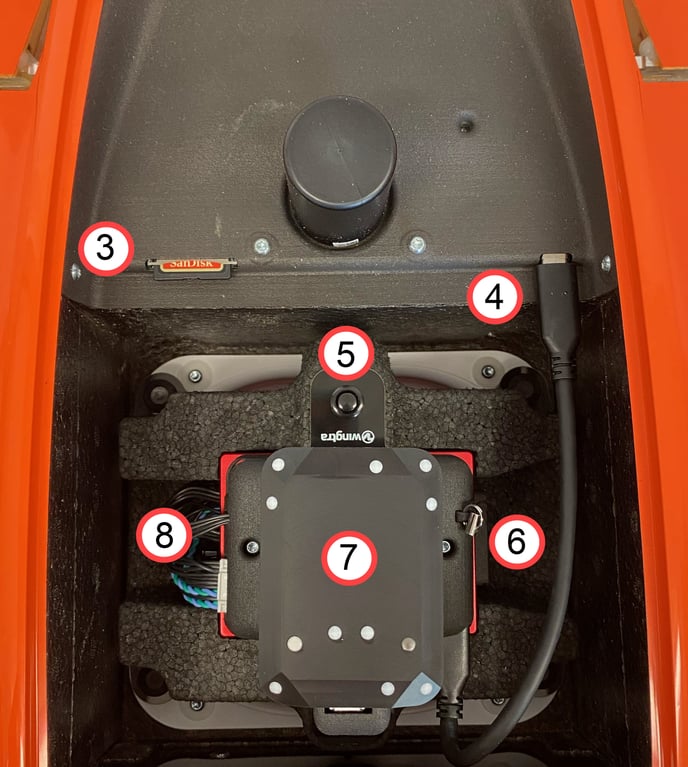
- WingtraOne SD card slot; The WingtraOne SD card needs to be inserted into the slot during the flight as the PPK data is stored there. It is also used for updating the firmware and downloading the flight logs. You can find more information about the WingtraOne SD card in the article WingtraOne SD cards.
- Payload connector (USB-C)
- Camera holder beam, used to fix the camera and should not be removed when flying
- SD card slot cover
- DLS sensor, GPS and compass
- RedEdge MX camera
The images are stored in the SD card inserted into the camera (6). Make sure to use the provided 128 GB SD card. You can find the full specifications of the SD card in the article WingtraOne SD cards.
After the flight is completed, retrieve the SD card from the camera by removing the cap and pushing the SD card into the camera before pulling it. It is easier to access the SD card by unlocking the camera holder beam (5) and lift the RedEdge out of the mount.
For updating WingtraOne or downloading WingtraOne flight logs, use the WingtraOne SD card that is inserted into the drone (3).
Additionally, the PPK data are stored in the WingtraOne SD card. Find more information about the multispectral PPK processing in the article PPK geotagging of multispectral imagery.
PPK geotagging of RedEdge images is only available for WingtraOne GEN II drones.
Set up for WingtraOne GEN I (868/900 MHz and 2.4GHz telemetry) RedEdge MX
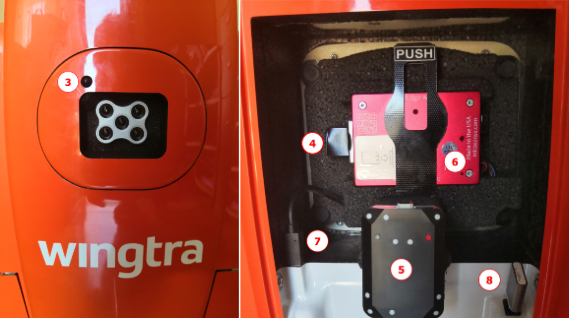
- Calibration panel
- RedEdge camera
- On/Off (pressing >3s) and trigger (press <1s) button
- SD card slot
- DLS sensor, GPS and compass
- RedEdge MX camera
- Payload connector (USB-C)
- USB storage (dongle not needed during flight, only needed for updating and downloading logs)
Make sure to use the provided 32 GB SDHC SD card. SD cards with high capacity (type SDXC) or lower feature read/write speeds that are not compatible with the RedEdge camera. The SD card slot is located on the side of the camera. To get it out, push the SD card to release it, before pulling on the black tape.
For updating WingtraOne or downloading WingtraOne flight logs, use the provided microSD card with the dongle and insert it into the USB storage (8).
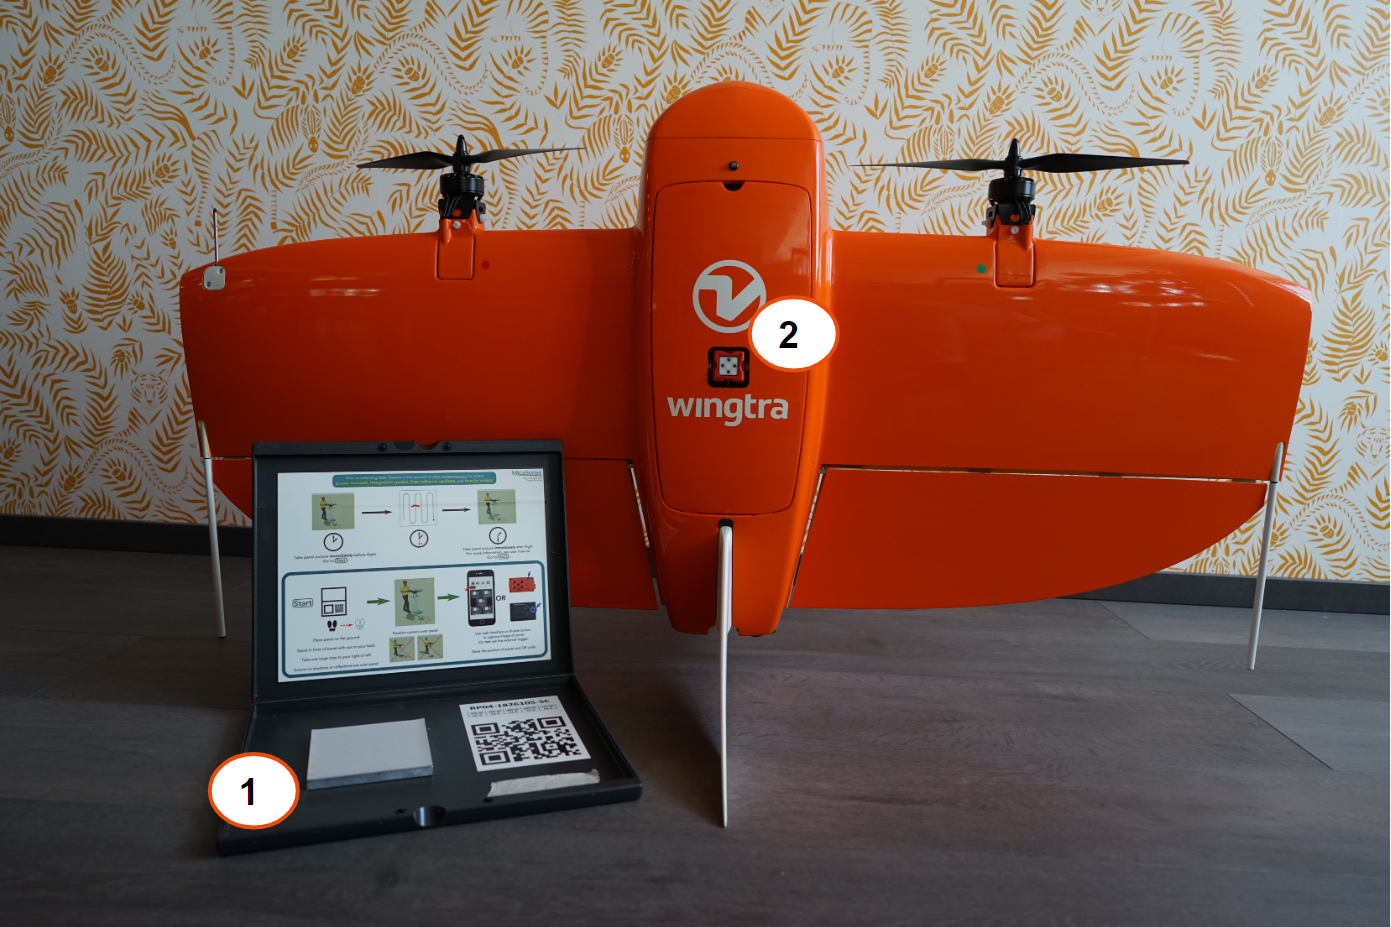
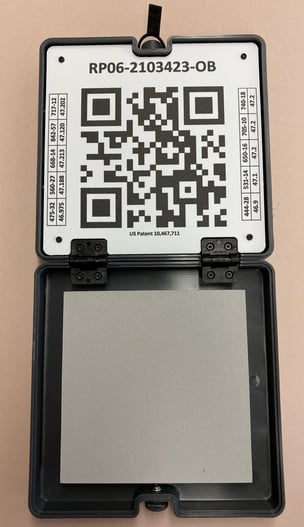
Calibration Panel
To successfully process MicaSense RedEdge MX data, calibration images need to be taken before the take off and after the landing and they should be imported into the post-processing software afterwards. To do so, you will use calibrated reflectance panels that are part of the RedEdge MX bundle.
The latest version of the calibration panel is more compact for better transportability and durability. This calibration panel can be used with any MicaSense sensor model, however, to use the QR functionality the camera firmware needs to be updated to the latest version (v7.2.0 for RedEdge-M/MX/Dual, v2.2.0 for Altum). You can find more information about the use of calibration panel in the Micasense Knowledge Base.
For more information about the data acquisition workflow with WingtraOne RedEdge, please refer to the Multispectral data acquisition with WingtraOne RedEdge article.