Important:
After upgrading to a WingtraRAY payload mount, reverting the payload to a WingtraOne GEN II mount is not supported and will void the warranty.
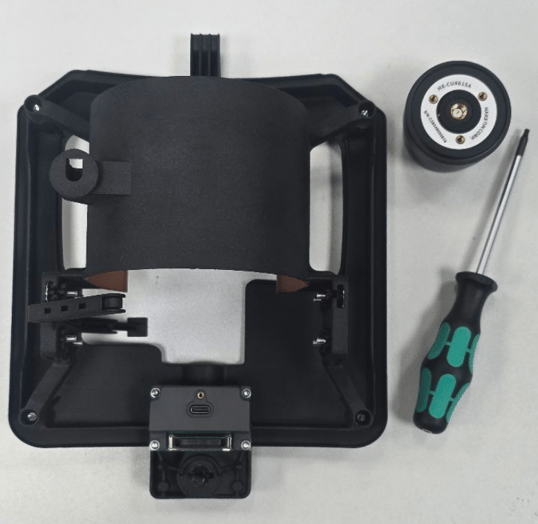
Tools needed: T10 screw driver (not Torx Plus)
|
# |
Illustration |
Instructions |
|
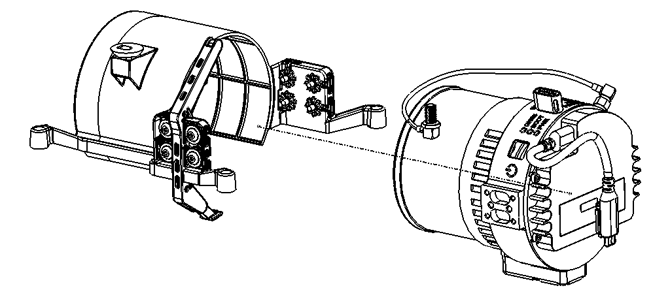
Disassemble GENII Payload |
||
|
1 |

|
Loosen and remove all four M3 screws from the side of the lidar mount by using the T10 screw driver. |
|
2 |

|
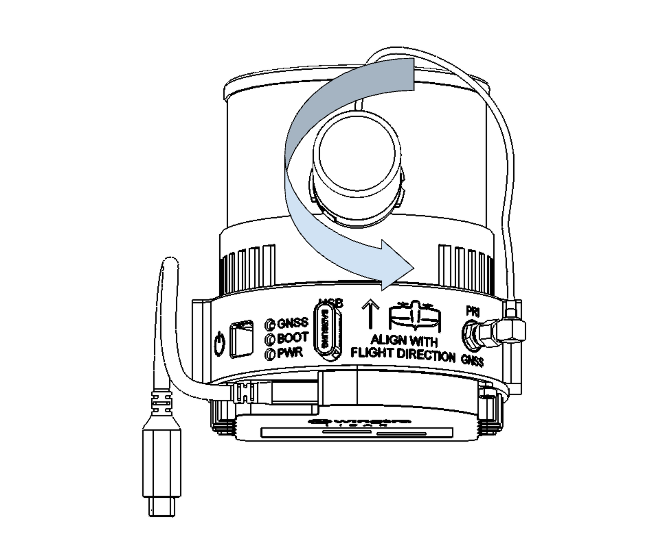
Remove the LIDAR and the antenna assembly from the mount. |
|
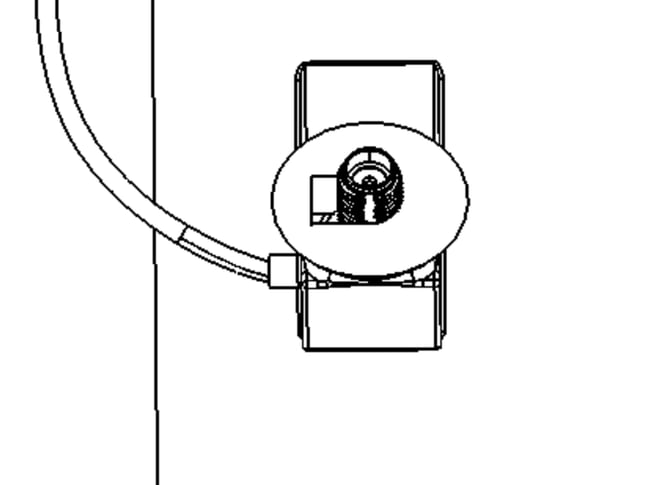
3 |
|
Untighten the antenna by rotating it counter-clockwise and remove the antenna and the antenna adapter |
|
Upgrade to WingtraRAY Payload |
||
|
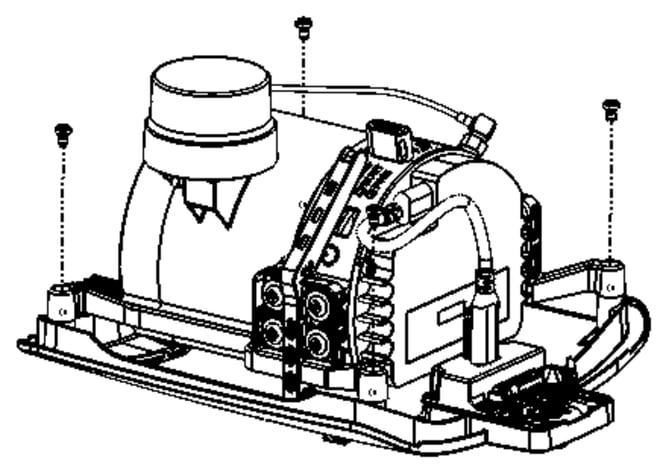
4 |
|
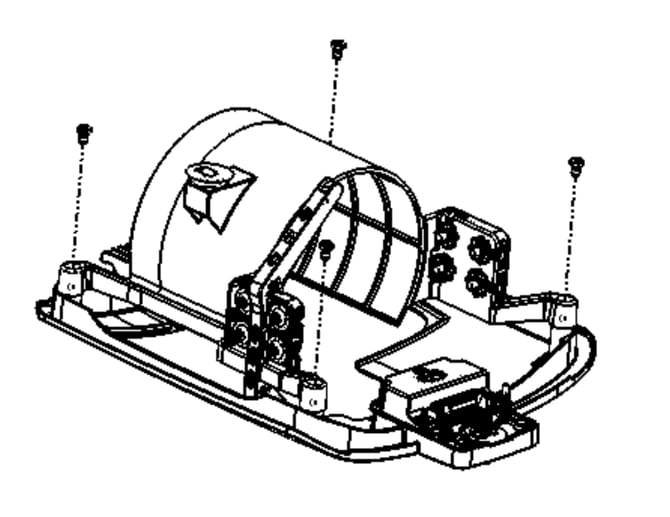
Remove the 4 T10 M3 screws so that the mount can be unmounted from the lower cover. Keep the lower cover and the screws |
|
5 |
|
Locate the LIDAR into the LIDAR mount as shown in the image |
|
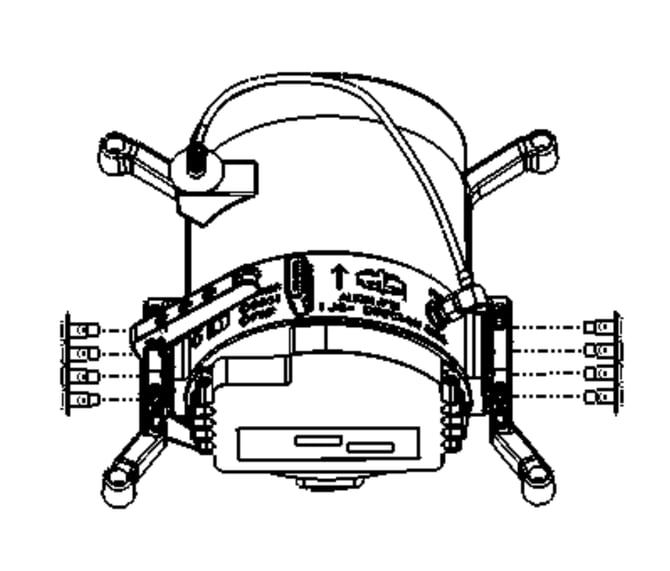
6 |
|
Tighten the shoulder screws with the T10 screw driver. There are 4 screws on each side. |
|
7 |
|
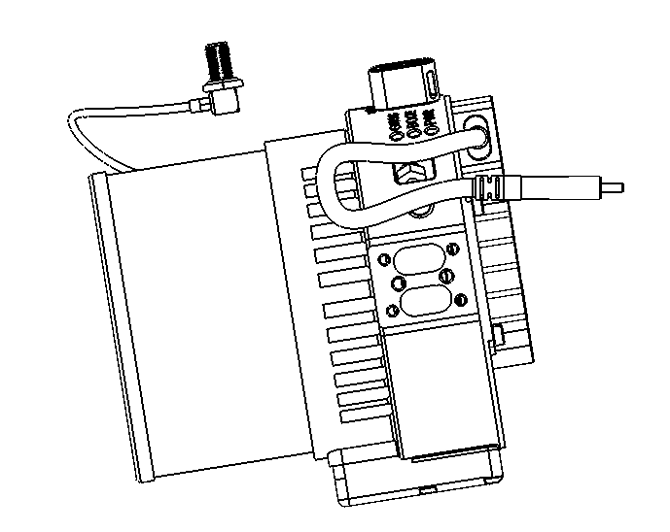
Place the SMA connector of the GNSS cable into the antenna holder feature of the mount. |
|
8 |

|
Tighten the antenna by rotating it clockwise. Do not overtighten. |
|
9 |
|
Place the lidar mount on top of the LIDAR lower cover and assemble them together by tightening the 4 M3 screws. |
|
10 |
|
Plug in the USB-C cable to the PIB board on the lower cover. |
|
11 |
|
You’re done with the payload upgrade |


Setting YAW angle to 180:
The payload on RAY is rotated 180 degrees compared to GEN II. The user has to change this setting if the FW version of the RAY is older than 2.19.3. This setting will be handled by the drone in the future in case the user transfers the payload from GEN II to RAY or vice versa.
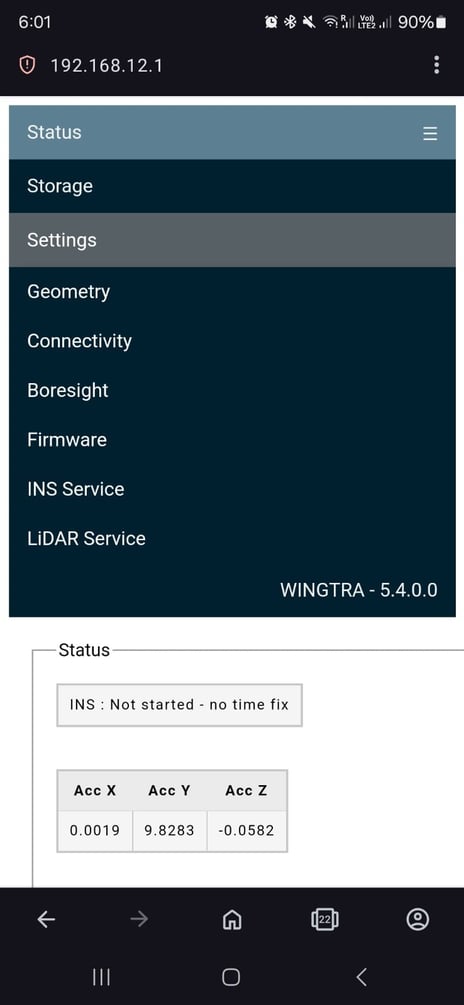
Assuming that the user powered the payload and established the wi-fi connection to the unit as described in this article:
- Open up the web browser of your choice and type in the IP address of the LIDAR payload: 192.168.12.1
- Go to Settings and Geometry from the menu:
3. Set the Yaw to 180 and roll to 90:
